News
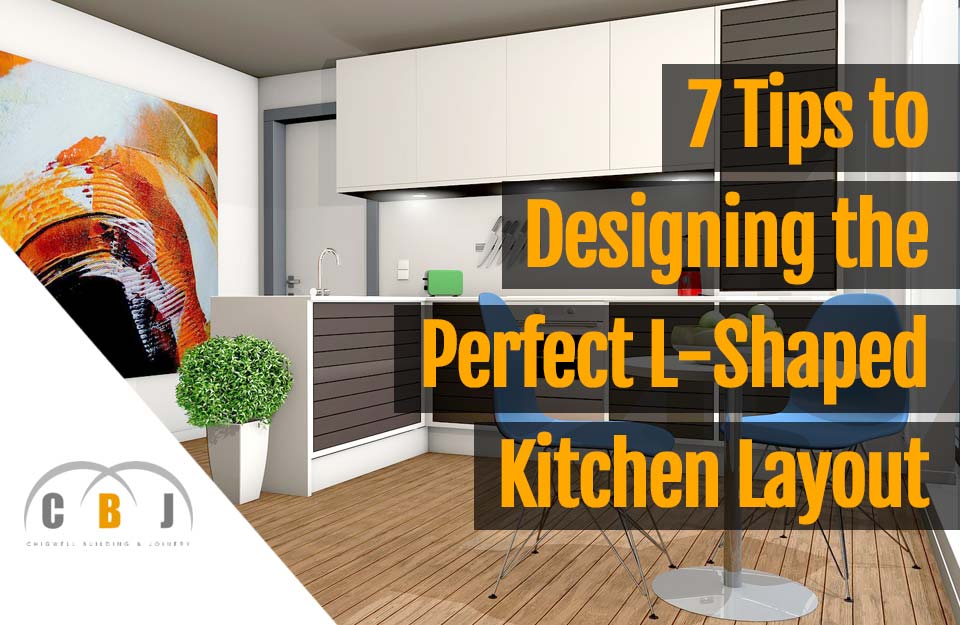
7 Tips to Designing the Perfect L-Shaped Kitchen Layout
Author Chigwell Building & Joinery
Date 07/01/2019
L-shaped kitchens have always been among the most popular.
The shape helps to maximise worktop space, while retaining the much sought after open plan design that many homeowners love.
L-shaped kitchens are versatile and they allow you to have all you might need close at hand while you are cooking. Moreover, if you have an l-shaped kitchen, or have used one, you know that this design allows the room to feel more spacious.
An L-shaped layout works well with both traditional as well as modern cabinetry, and should there be any structural demands in the room, such as, a large window or door, or sloping ceilings, you can still work your way around them with some careful planning.
Considering all of these benefits, let us elaborate on some tips which will help you design your L-shaped kitchen.
1. The working triangle
You might have heard of this expression sometime or other.
When planning kitchens, designers place a great deal of importance on creating a working triangle, which basically means that the distances between the sink, the oven and the refrigerator are well thought out.
These are the three most important elements in any kitchen, and you want to have a comfortable distance from one to another to avoid useless movements to and fro.
An L-shaped kitchen design generally makes the creation of the working triangle quite straightforward.
2. Logical movement
Planning is key, and this is even more important in such an important room as the kitchen is in any household.
In the kitchen you are going to have people coming in and out, grabbing a snack, sitting at the table eating, preparing a meal, opening the fridge, and so on!
So you need to be aware of the importance of considering the traffic flow in your kitchen while you are designing it.
This includes considering the entry and exit points, where you should place the table, whether there is enough place to include an island, as well as the sight lines.
3. The Island
L-shaped kitchens are generally complemented by an island in the middle of the room.
While this increases worktop space even further, it can also improve your working triangle as the hob can be placed in the island, and be right in the middle of the room.
Islands will also offer more space for storage needs.
4. Integrating custom features
You will want to make the best use out of the space available, and this implies taking the time to design the layout of the various cupboards and drawers in your kitchen, as well as any open shelves.
Consider different storage options and custom features which will help you to satisfy your personal preferences and storage needs, while maximising the space available.

5. Tall units
Wall cabinets are very popular in kitchens nowadays, including l-shaped kitchens.
With tall units you will be making the best possible use of the wall space available, and this increases storage possibilities, which in turn helps to reduce clutter from your worktop.
6. Corner cupboard considerations
With an L-shaped kitchen you are inevitably going to have a corner cupboard.
Such cupboards tend to end up being rather under-utilised because of the depth that they will have to have.
Plan well what you could place in this cupboard. Naturally you cannot store essential items that you will be using often.
However for certain items that are used on a seasonal or occasional basis, a corner cupboard can be perfect as it is spacious by nature.
You might also wish to install racks that move outwards so as to reduce the need of having to kneel down and fumble into the deepest parts of the corner cupboards.
7. Improving small spaces
An l-shaped kitchen design helps you to maximise the efficiency and use of space even if the room is rather small.
Besides being practical, it can also be aesthetically pleasing, and with some considerations you can even make it look spacious.
For instance, try to include open shelves to reduce the crammed look many cupboard doors next to each other might lead to. Make sure to choose light colours and to mix and match the cabinets and drawers’ positions.
Hi-gloss units make a small space look bigger too. You could also hang a fixed rail below bottom shelves and cupboards so as to hook up any saucepans and pans to them.
This reduces the need to store them inside the cupboards, leaving more space for other items, equipment and utensils.
Conclusion
An L-shaped kitchen can be very compact and practical. With careful planning you can design a beautiful and comfortable kitchen for your home, which will be literally the hub for your family.

How to Build a Fitted Wardrobe Using MDF (Step-by-Step Guide)
Author Chigwell Building & Joinery
Date 09/11/2018
What if we told you it was really easy to build your own fitted wardrobe using MDF?
Even better, how would you feel if we told you it can be done in a single weekend?
Yes, it's true!
In this article, we're going to share with you how it's done... simply!
Most bedrooms have a common problem – too many items to store, and not enough storage space!
This leads to a lot of clutter and items stored in all sorts of impractical places. If you are in this kind of situation and would gladly like to do something about it, then continue reading...

How to build a fitted wardrobe yourself
A fitted wardrobe will help you make the best use of your limited space, and you will not have to spend a fortune making it
You could fit a wardrobe underneath a staircase, or in a small corner of a room, enabling you to gain more storage space.
You can also customise it just the way you like, making it easier to complement any existing furnishings or colour schemes
It's fairly simple to build a wardrobe yourself by using affordable MDF boards.
Just go through the following steps to see for yourself.
1. Determine the Space
You will first need to decide where you intend to place your wardrobe.
Measure the space so as to plan it out.
You will want to make maximum use of the height available, especially if your floor space is limited.
2. Set Your Dimensions
Once you've measured up your space, you will then need to set out the overall dimensions of the wardrobe.
Ideally there should be a width of about 50cm per door, or double that for a double doored wardrobe.
Make sure you consider the way the doors will open, and the layout inside the wardrobe.
Remember... it's always a good idea to think about the types of items you intend to store in your wardrobe.
This will enable you to plan properly in terms of number and types of shelves, hanging space and drawers.
So... always plan ahead!
3. Get the Right Tools
You will need to have the right tools to make the job as easy as possible. Never try to cheat. Tools make light work!
You will need:
- measuring tape
- good quality screws at various lengths
- a saw
- an electric drill
- electric screwdriver or impact driver
- a wood plane
- wood glue or suitable adhesive
4. Define Compartments
You will need to spend a considerable amount of time planning on paper
This is to make sure that you define all the compartments that there will be inside the wardrobe, as well as the various panels and parts you will have to have for each and every one of them.
18mm MDF panels are ideal for the outer parts as well as the inner compartments, whereas 12mm wide panels can suffice for the door panels.
When going to buy the MDF boards, make sure to take the dimensions of all the individuals parts with you as most timber stores will cut them out for you, saving you a great deal of time and effort.
Smaller cuts can be easily done at home with a handsaw, but the longer cuts are much harder and time consuming unless you have a good quality jigsaw or circular saw.
You will need to start off by setting up the outer frame of the wardrobe.
Reinforce the joints of these outer structure panels with corner brackets as well as screws.
When this structure is in place, you can then move on to the smaller parts, that is, the various inner compartments.
5. Shelves & Drawers
Make sure to mark all the panels and parts as this will make it easier for you when you start forming the drawers and compartments.
It's a good idea to create grooves which will allow you to slide the required panels inside easily, before screwing them up to the horizontal panels above and below, or to vertical ones on the sides.
Make sure everything is properly aligned.
Drawers can be constructed really easily.
Measure up the four parts, glue them to one another, and finally screw them up together.
Attach the runners on the sides, and insert into the wardrobe to see that they fit properly and align well.
You may wish to install a front panel for more sturdiness and to install the knob more easily.
Shelves are even easier to make than drawers!
All you need is panels, and the side fittings to place them onto when inserting them into their rightful places inside the wardrobe.
And finally, install the doors! Your wardrobe is practically finished!
6. Materials & Finishing
With regards to materials, you will need plenty of MDF boards cut to the required size.
MDF is smooth, so there is no need for sanding, other than at the edges where the cuts have been made.
7. Hardware & Handles
You are going to need many screws.
Try to choose screws that do not make a very large hole when fastened to the panels.
You will also need drawer runners for drawers.
You will need knobs or handles for drawers and for the wardrobe doors.
Corner brackets are recommended for more sturdiness, and you will also need brackets for the shelves.
And that's practically it... you're virtually done!
As you can see it is really easy.
All you need are some basic tools, affordable materials and hardware, and some forward planning!
See It in Action
If you are still unsure how to follow our guidelines, watch this amazing video uploaded to YouTube by Charlie DIYte for really helpful instructions on making your own fitted wardrobe using MDF sheets:
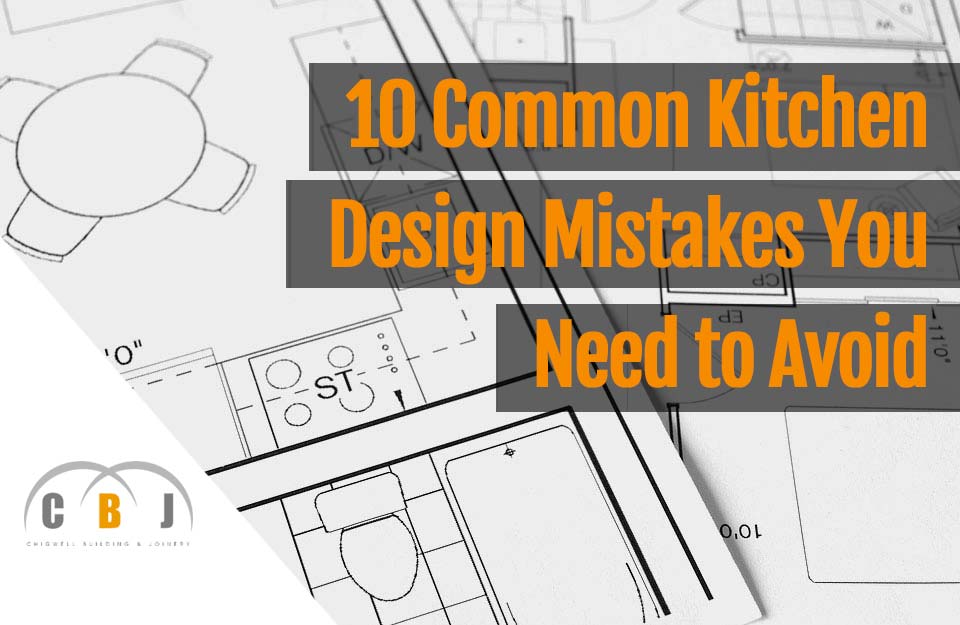
10 Common Kitchen Design Mistakes You Need to Avoid
Author Chigwell Building & Joinery
Date 15/10/2018
When it comes to kitchen renovations it is always best to consult experts and professionals that understand the different elements and features of a strategic design. There are certain rules that are generally followed when it comes to designing the layout of your new kitchen. This is an incredibly important area and it must be designed properly. If you are planning on renovating your kitchen or beginning from scratch, this article will outline how to avoid the top 10 design mistakes that too many home owners have make.
The following outline will give you 10 common mistakes that you will want to avoid at all costs. Your kitchen is an integral room in your home, so be sure to follow these suggestions as you continue reading below.
1) Lack of Traffic Flow
Being able to access all the different sections of your kitchen is important and leads to a better functioning area. You will need to design the right layout that optimises the space available to you. You want a fully functioning cooking area that allows for good workflow and is easy to move around.
2) Unused Storage Space
There is plenty of different things in a kitchen and you will undoubtedly need plenty of storage space. Be sure that everything is organised and that your food preparation areas are clear of clutter and allow space. You can use the walls to hang objects or you can increase cupboard space and even install vertical cabinets. There are many different options available to maximise storage space. Just look at the different options out there and be creative.
3) Poor Lighting
Every kitchen needs to provide good lighting as there are many tasks that are involved with food preparation. Adding illumination can add beauty to your cooking area but it does not need to be a dramatic effect. Ensure that you have a safe working area that is properly lighted for preparing food.
4) Low-Quality Kitchen Items
You will want to purchase items that will last for a long time and won't break down from wear and tear right away. Purchasing items at a discount or using poor quality products will only cost you more money. Kitchen environments provide a lot of wear and tear so invest in quality items to save money instead of wasting it on inefficient tools you will need to regularly replace.
5) Bad Ventilation
Having a kitchen that stinks up the entire house with the foods you are cooking is not ideal. You will want to ensure that your kitchen is well ventilated and using range hoods will circulate air. Also adding a window can help with fumes, whilst decent ventilation extends the life of your appliances and will fill your home with fresh air and fewer odours.
6) Using an Inappropriate Kitchen Island
Having the wrong kitchen island or having it in the wrong location causes more trouble then it solves. It may, in fact, cause clutter and hassles with manoeuvrability and cooking. Make sure you choose the correct shape and size that won't obstruct the kitchen or interrupt traffic flow.
7) Bad Garbage Systems
You will need an optimised solution for dealing with trash management when it comes to your kitchen. Your cooking area can end up looking dirty and even smelling bad if this is not managed appropriately. You need cleanliness and having proper garbage disposal is necessary. A good idea is to use a container that has a cover or hide it in the cabinet.
8) Changing the Kitchen Layout
Some people will make a final decision on what they desire and then they keep on making changes. You will want to stick to your design plan and meet your requirements. Changing your ideas and layout will only cost more money. Be sure to pick a plan that you can stick with that you will appreciate.
9) Following Trends
Some homeowners will choose to follow a certain trend or style just for the sake of it. Unfortunately once the trend has changed, your kitchen will look outdated. If you cannot redesign and refit your kitchen regularly, then you should use a timeless design that works for you. It is a good idea to use a general theme and to avoid overspending on appliances based on trends.
10) Not Seeking Consultation
If you are not a design professional, don't try to do the work yourself. You can save money and ensure proper workmanship by hiring professionals to get it done for you. You can also hire consultants for design ideas and to really get the kitchen of your dreams. Also, pick a budget and stick to it and be flexible for best results.
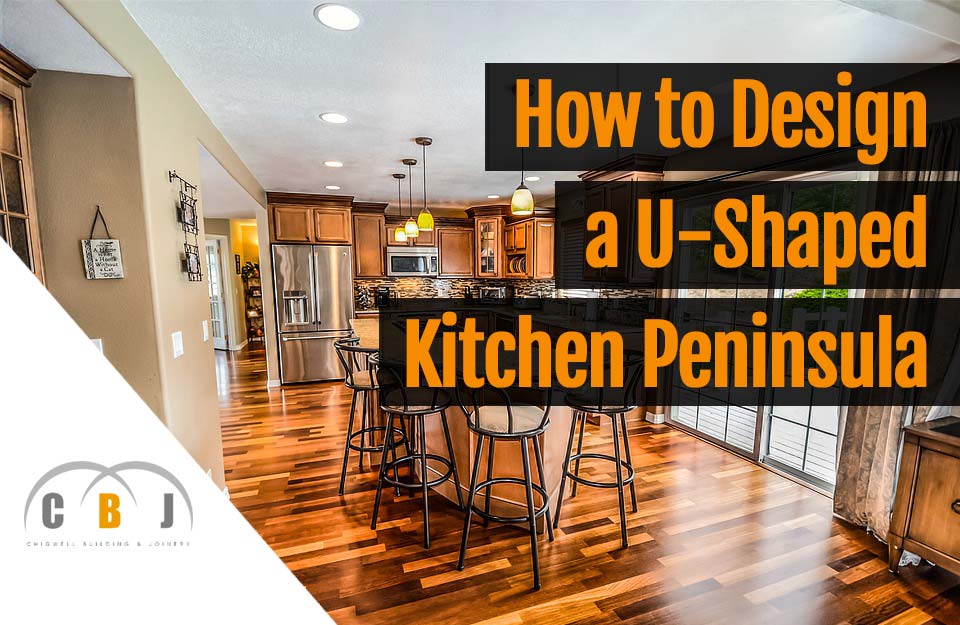
How to Design a U-Shaped Kitchen Peninsula
Author Chigwell Building & Joinery
Date 13/09/2018
Choosing a U-shaped kitchen peninsula can be a great addition as an ideal option for those who are looking to change the look and layout of their kitchen. When peninsula kitchen designs are utilised, they offer many of the same benefits as an island that includes extra storage space, more workspace for food preparation, as well as a place to socialise with family and friends. A U-shaped kitchen peninsula can fit in almost any kitchen location and this article will enlighten you to the various complexities involved with designing a U-shaped kitchen peninsula that brings better functionality to your cooking area.
There are 5 key points that we will examine on how to build the best U-shaped peninsula possible. Continue reading below to gain much-needed details that you should know before choosing to incorporate this feature into your kitchen design:
What is a Peninsula?
The first thing you will need to know is what exactly a U-shaped kitchen peninsula is. They are very similar to a kitchen island in the sense that they are a unit that provides a worktop and storage space. However, instead of standing freely in the middle of your kitchen, a U-shaped kitchen peninsula is attached to three walls and have a distinct shape. They are accessible from one side and are an extension to help separate open space in the layout of the kitchen. A kitchen island is accessible from all four separate sides which differentiates the U-shaped peninsula.
1) Pros & Cons
There are plenty of positive and negative attributes in choosing to implement this design in your kitchen design. They definitely offer you more counter space and since it is connected to walls there is more storage space that can incorporate extra cupboards and drawers. Another positive attribute to a peninsula is that they fit in smaller kitchens as well as bigger ones. The negative attributes to a peninsula are that they can take up needed space and room and they have less room for other people. They are also more expensive than other peninsulas and islands.
2) Planning the Layout
You will be limited only by your imagination and the available space you have in your kitchen. There are a few methods you can integrate a U-shaped peninsula into your overall layout. You can use it to define a room that helps define zones. They can also be used as a place to eat for breakfasts and casual meals. You can even add a peninsula to an L-shaped kitchen to create the surface area of a U-shaped peninsula. You can also incorporate kitchen appliances within the design.
3) Sink & Hob Positions
Another thing that can be implemented into the design of a U-shaped kitchen peninsula is where you position your hob as well as the sink. It is common for home designers to have the sink and the hob to be in a position directly opposite from each other so they are easily accessible while doing things such as food preparation and cooking. Be sure to have all of the necessities of your U-shaped peninsula to be close to each other for better fluidity and economy of time, motion, and space.
4) Symmetry & Balance
The benefits of U-shaped kitchens give you the distinct opportunity for symmetry with a design that is well balanced. You don't want to compromise the integrity or usability of your kitchen but many homeowners enjoy a clean and balanced aesthetic by incorporating beautiful symmetry. You can easily incorporate kitchen appliances into the symmetry or you can also deviate from a typical design. Your home is entirely unique as you are and building your peninsula will be dependent on the space and structure you have to work within your kitchen area.
5) Maximise Counter Space
Whatever size kitchen your home may have, a benefit of a U-shaped peninsula will give you extra counter space that you can use. It can be utilised for preparing food and can even serve as an area for eating breakfast or even socialising with family and friends. Having more counter space will also offer a much cleaner and less cluttered working area.
A U-shaped peninsula is a great way to improve your kitchen.
With a U-shaped peninsula design, you give yourself much more room for flexibility in designing the final layout. There are plenty of different possibilities and variations on what you can achieve when using this design plan. Be sure to utilise the suggestions above that are right for you and your kitchen needs.

6 Common Practical Uses of MDF (Medium Density Fibreboard)
Author Chigwell Building & Joinery
Date 06/08/2018
Medium Density Fibreboard is a specially engineered product that is created from wood fibres.
It is a dense product and has many different uses in a variety of industries.
Fibreboard is a sturdy product and is often covered with a veneer and it can also include secondary raw materials such as fibres from sugarcane and wood chipping.
This is an incredibly versatile material to work with and this article we'll share with you the different practical uses for MDF and what you can do with it.
Furniture
To begin with, many different furniture companies utilise specially measured MDF boards and if you have ever purchased an inexpensive piece of furniture like a bookshelf or an entertainment centre, then chances are they may be constructed from MDF.
Many different inexpensive furniture pieces are constructed from low to medium-density fibreboard because this particular product is easily produced and is economical, which lowers the cost of manufacturing and production.
Using low-density fibreboard typically reduces the costs associated with producing furniture and it is a very common material that is used in the creation of prefabricated furniture.
Companies like IKEA and other big store companies offer products that are built from this material.
Cabinetry
Another thing that medium density fibreboard is known for is home interior cabinetry.
It's most common to find cabinets made of fibreboard and then finished with solid wood laminate on top.
Home interior products like kitchen cabinets and shelving units are typically built from MDF and this also includes doors, mouldings and sometimes even flooring such as wood effect laminates.
There are many different applications that can be integrated with using medium density fibreboard and these are only a few examples of how it is used in home interiors.
Fire Resistance
One interesting use for medium density fibreboard that many people may not be aware of is for its fire retardant capabilities.
Certain buildings and structures require the use of fire retardant MDF in their construction.
This type of fibreboard is known to be used in the construction of commercial buildings which include stores and offices and other buildings that must meet certain building regulations and requirements for safety.
Some homeowners choose to use fire retardant MDF in the construction of their homes as well as to provide further protection from any possible fires spreading.
Vapour Repulsion
Medium density fibreboard can also be utilised as a vapour barrier and insulation for both homes and commercial buildings.
This is because it has a durability and treatment that makes it an excellent vapour barrier when used with other vapour repellant products.
This type of wood is able to deal with long periods of moisture and drying out without being damaged like shrinking or going through the process of rotting.
It can act as a vapour barrier and it can also offer insulation and prevent heat loss which would ultimately help with lowering heating costs and electrical bills.
Soundproofing
This may not be as widely known, but fibreboard can also provide soundproofing and lower the ability of sound to travel.
Many speaker manufacturers use medium density fibreboard or particle board because it absorbs sound and prevents vibration from inside the speaker casing.
This wood product can also be used in media rooms, walls of apartment buildings and offices as well as floor underlayment to help minimise sound disturbances and noise pollution.
Many different contractors and building companies use MDF for this particular purpose during construction for the application of reducing noise and sound traveling.
Roofing
Another interesting fact about the versatility known for fibreboard is its use for around the home both inside and outside.
Fibreboard can be used for all sorts of housing needs including roofing materials for low sloped roofs.
MDF is an excellent material that can be used as backing for shingles of any kind of roof.
You can also use it as sheathing for walls inside your home.
MDF is incredibly durable as well as flexible which gives it numerous applications when it comes to a family home both in the interior and exterior.
Ultimately medium density fibreboard is a top-notch solution with many different uses and things that it can be used for.
This list of common practical uses of MDF is just a short example and there are plenty of more uses that MDF can be utilised for.
It will continue to be a cheaper option rather than purchasing timber products such as plywood and with its numerous uses, it will always be a well known and widely used material in the fabrication of furniture all the way to the construction of buildings and homes.

