News
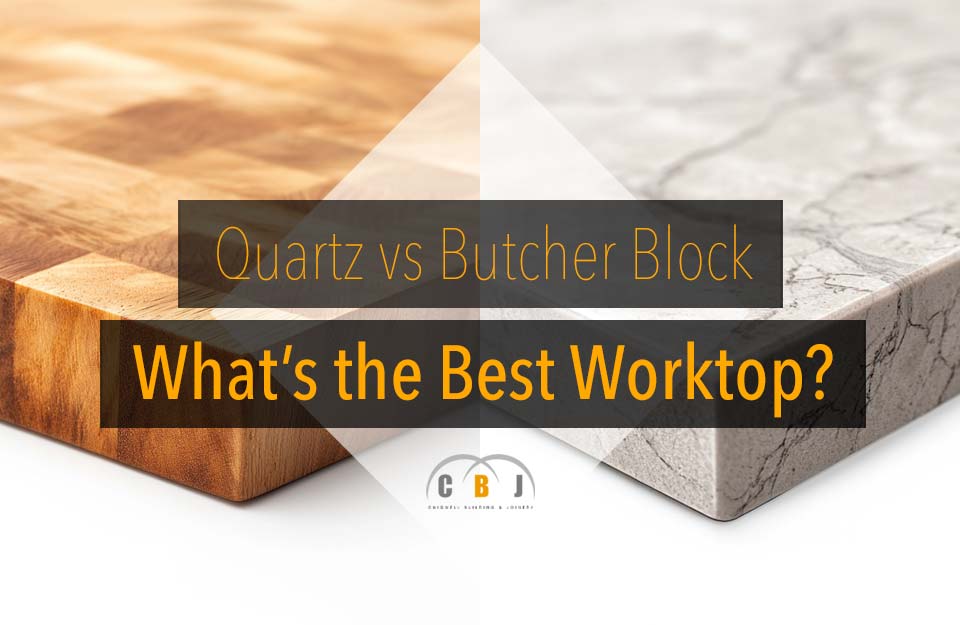
Quartz vs Butcher Block - What's the Best Worktop?
Author Chigwell Building & Joinery
Date 15/04/2025
When installing brand new kitchen cabinets, choosing the right worktop is a crucial decision that affects both aesthetics and functionality.
Among the most popular choices are quartz vs butcher block countertops, each offering distinct advantages and challenges.
Whether you're looking for durability, low maintenance, or a warm and natural aesthetic, this guide will help you understand the differences and make an informed decision.
Table of Contents
- What is Butcher Block?
- What is Quartz?
- Origins
- Appearance
- Imperfections
- Durability
- Stain Resistance
- Marks and Scratching
- Maintenance and Care
- Heat Resistance
- Strength
- Longevity
- Water Resistance
- Design
- Installation
- Cost
- Added Value
- Conclusion
What is Butcher Block?

Butcher block countertops are crafted from solid wood, typically made by bonding strips of hardwood such as maple, oak, cherry, or walnut.
This creates a sturdy and visually appealing surface with natural grain patterns and warm tones.
Originally designed for heavy-duty kitchen tasks, butcher block worktops have found their way into modern homes, offering a timeless, rustic charm.
However, as a natural material, wood requires regular maintenance to keep it looking its best and to prevent damage from moisture and wear.
What is Quartz?

Quartz countertops are engineered surfaces made from natural quartz crystals combined with resins and pigments to create a highly durable, non-porous material.
Unlike natural stone, quartz worktops are manufactured to provide a consistent appearance, making them a preferred choice for homeowners seeking a sleek, modern aesthetic.
Available in a wide range of colours and patterns, quartz can mimic the appearance of marble, granite, or other natural stones without the drawbacks of high maintenance.
Origins
The primary distinction between these two materials lies in their composition.
Butcher block is sourced from natural hardwood, while quartz is an engineered material designed for enhanced strength and consistency.
This difference affects everything from durability to maintenance and overall appearance.
Appearance
If you’re drawn to a warm, natural look, butcher block offers a rich, organic aesthetic with unique grain patterns that add character to any kitchen.
Over time, the wood develops a patina, enhancing its charm.
Quartz, on the other hand, provides a sleek and polished finish, ideal for modern and contemporary designs.
With an extensive selection of colours and patterns, quartz allows for greater customisation without the imperfections that come with natural materials.
Imperfections
Because butcher block is made from real wood, it often features natural knots, streaks, and variations in colour.
While many homeowners appreciate these imperfections for their rustic appeal, others may find them less desirable.
Quartz, being a man-made material, is designed to be uniform, free from natural inconsistencies, ensuring a flawless look throughout the surface.
Durability

While both materials are durable, quartz has the upper hand when it comes to resistance against wear and tear.
Its engineered composition makes it highly resistant to scratches, chips, and cracks.
Butcher block, on the other hand, is softer and more susceptible to dents and scratches, though minor damage can often be sanded out and refinished.
Stain Resistance

One of the biggest drawbacks of butcher block is its porosity, making it vulnerable to stains if not properly sealed.
Liquids, particularly oil and wine, can seep into the wood and cause discolouration.
Quartz, being non-porous, is highly resistant to stains and does not require sealing, making it a hassle-free option for busy kitchens.
Marks and Scratching
Unlike quartz, which is highly resistant to scratches, butcher block surfaces can be easily marked by knives and kitchen utensils.
While this may be a drawback for some, others embrace the worn-in look that develops over time.
If you prefer a pristine surface that remains unblemished, quartz is the better choice.
Maintenance and Care
Keeping a butcher block worktop in good condition requires regular oiling and sealing to protect against moisture and stains.
It’s also important to clean up spills immediately to prevent damage.
Quartz, on the other hand, is incredibly low maintenance.
A simple wipe with soap and water is enough to keep it looking pristine, making it a practical choice for those who prefer minimal upkeep.
Heat Resistance
Both materials have limitations when it comes to heat resistance.
While butcher block can withstand moderate heat, prolonged exposure to hot pots and pans can cause scorching or warping.
Quartz, though more resilient, is not entirely heat-proof.
Placing hot cookware directly on the surface can lead to thermal shock and potential damage.
Using trivets or heat pads is recommended for both options.
Strength
Quartz is one of the strongest worktop materials available, offering excellent resistance to impacts and heavy use.
Butcher block, while durable, is more prone to dents and damage from excessive force.
If strength and longevity are top priorities, quartz is the superior option.
Longevity

Both materials can last for decades with proper care.
Butcher block requires periodic refinishing to maintain its appearance, whereas quartz retains its look with minimal effort.
For homeowners seeking a long-lasting, hassle-free solution, quartz is the more practical choice.
Water Resistance
One of the biggest challenges with butcher block is its susceptibility to moisture damage.
If not properly sealed, water can seep into the wood, causing swelling, warping, or even mould growth.
Quartz, being non-porous, is highly resistant to water, making it an ideal choice for kitchens with high moisture levels.
Design
The choice between quartz and butcher block often comes down to personal style.
Butcher block complements traditional, farmhouse, and Scandinavian-inspired kitchens, bringing warmth and texture to the space.
Quartz, on the other hand, offers a contemporary, polished look that works well in modern and minimalist designs.
With quartz, you also have more flexibility in choosing colours and patterns that match your kitchen decor.
Installation

Installing a butcher block worktop requires precision and sealing to prevent moisture absorption.
DIY installation is possible but requires skill, as cutting and sealing must be done carefully.
Quartz installation, however, is best left to professionals due to its weight and the need for specialised tools.
While this adds to the overall cost, professional installation ensures a seamless and durable result.
Cost
Butcher block is generally more affordable than quartz, with prices varying based on the type of wood used.
However, ongoing maintenance costs should be factored in, as regular sealing and refinishing may be necessary.
Quartz, while more expensive upfront, requires little maintenance, making it a cost-effective option in the long run.
Added Value

When considering resale value, quartz typically adds more to a home’s worth due to its durability, low maintenance, and modern appeal.
Butcher block can also enhance a home's aesthetic, particularly in rustic or country-style kitchens, but may not be as universally appealing to potential buyers.
Conclusion
Choosing between quartz and butcher block depends on your priorities and lifestyle.
If you value warmth, natural beauty, and are willing to put in the effort for upkeep, butcher block can be a charming addition to your kitchen.
However, if you prefer a durable, low-maintenance, and modern surface, quartz is the better investment.
Both materials offer unique benefits, so consider how each aligns with your kitchen’s functionality and design before making your decision.
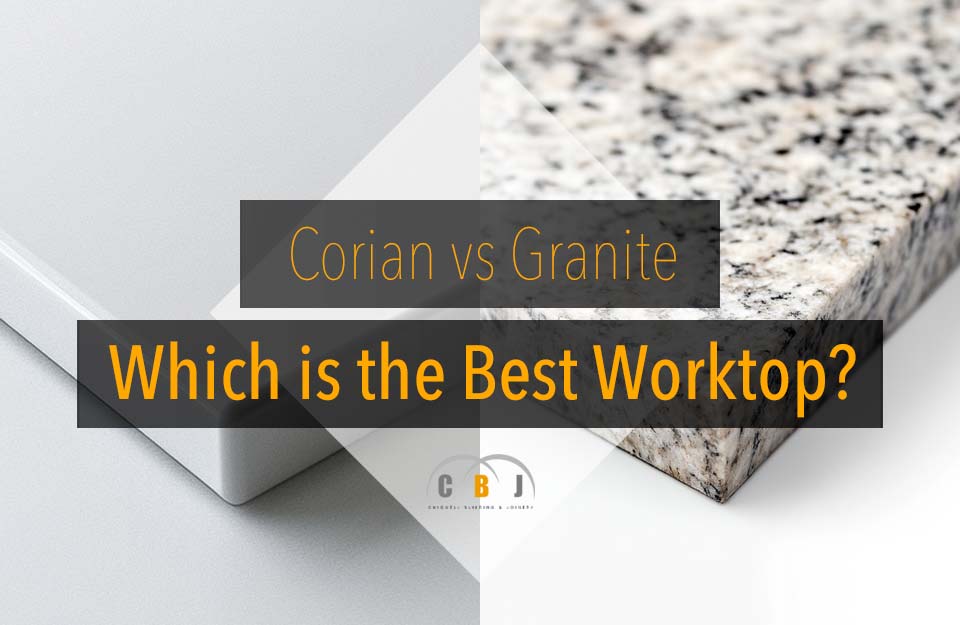
Corian vs Granite - What's the Best Worktop?
Author Chigwell Building & Joinery
Date 01/04/2025
When it comes to choosing the ideal worktop for your kitchen or bathroom, Corian and granite are two of the most popular options.
Both materials offer unique benefits, but the decision of which one is better for your home depends on your needs, style preferences, and budget.
In this article, we will compare Corian and granite worktops, covering everything from appearance and durability to maintenance and cost, helping you make a well-informed decision on which is best for you.
Table of Contents
- What is Corian?
- What is Granite?
- Origin
- Appearance
- Imperfections
- Durability
- Stain Resistance
- Mark and Scratch Resistance
- Maintenance and Care
- Heat Resistance
- Strength
- Longevity
- Water Resistance
- Design
- Installation
- Cost
- Conclusion
What is Corian?

Corian is a brand of solid surface material made primarily from acrylic polymer and natural minerals.
It was developed by DuPont in the 1960s and has since become one of the most widely used materials for kitchen and bathroom worktops.
Corian is a non-porous, versatile surface that can be moulded into virtually any shape, making it perfect for custom designs.
It can mimic the appearance of natural stone, but it is easier to work with due to its pliability.
Additionally, Corian is available in a wide range of colours and patterns, giving homeowners a broad selection to choose from.
One of the standout features of Corian is its seamless appearance.
Because it is a solid surface, it does not require joints or seams, creating a smooth, continuous look.
This also means that there are fewer places where dirt, bacteria, and moisture can accumulate, making it a more hygienic option in some cases.
What is Granite?

Granite is a naturally occurring igneous rock composed mainly of quartz, feldspar, and mica.
It has been used for centuries in construction and is particularly popular in kitchen worktops due to its stunning aesthetic appeal and durability.
Granite is quarried in large blocks and cut into slabs, which are then polished and shaped to fit your desired design.
Granite worktops are known for their unique patterns and natural beauty.
Each slab is different, making granite one of the most sought-after materials for homeowners looking for a luxurious and timeless look.
Additionally, granite is an incredibly strong material, resistant to heat, scratching, and impact.
However, it is porous, which means it must be sealed periodically to maintain its integrity and prevent staining.
Origin
Corian is a manufactured product, combining acrylic polymers and natural minerals, designed to offer a versatile alternative to natural stone.
It is created in controlled environments, meaning it is available in a consistent range of colours and patterns.
On the other hand, granite is a natural stone that is mined from quarries around the world.
Its appearance is influenced by the minerals within the stone, resulting in unique patterns and colours that vary from slab to slab.
Appearance
Corian offers a sleek, modern look with an even, consistent colour throughout the surface.
It can imitate the look of natural stones like marble or granite, but it is not identical.
Corian’s appearance is uniform, which some people prefer, while others may seek the natural variations that granite provides.
Granite’s appeal lies in its natural beauty, with each slab boasting its own one-of-a-kind pattern, ranging from subtle to bold.
Some people find the natural imperfections in granite more attractive, as it creates a more organic and authentic feel in the space.
Imperfections
While both Corian and granite are high-quality materials, each has its own set of imperfections.
Granite is naturally porous and can develop cracks or chips over time, especially if heavy objects are dropped on it.
It also tends to show small fissures and variations in its surface, which many consider part of its charm.
Corian, however, is non-porous and more resistant to visible imperfections.
However, it can be scratched or gouged, especially if sharp objects are used directly on its surface.
The good news is that Corian can be repaired easily by a professional or, in some cases, by homeowners themselves.
Durability
Granite is renowned for its durability.
It is one of the hardest materials available, able to withstand heavy use, heat, and impact.
This makes granite an excellent choice for high-traffic areas like kitchen countertops.
However, it is not invincible.
Over time, granite can be scratched or chipped if exposed to sharp objects or excessive force.
Corian is also a durable material, though not as resilient as granite.
While it can handle everyday use and is resistant to stains and moisture, it is more vulnerable to scratches and gouges.
Corian surfaces are not as resistant to heat as granite, so care should be taken to avoid placing hot pans or appliances directly on them.
Stain Resistance

Corian is non-porous, which makes it highly resistant to stains.
Liquids like wine, coffee, or oils are less likely to seep into the surface and leave permanent marks.
Any stains that do occur can typically be wiped away easily.
On the other hand, granite is porous and can absorb liquids if not properly sealed.
This makes granite more susceptible to stains, especially from oils, acidic substances, or coloured liquids.
Fortunately, with proper sealing and maintenance, granite worktops can become more resistant to staining.
Mark and Scratch Resistance
Granite is extremely resistant to scratches due to its hard surface, making it ideal for use in busy kitchens.
However, it is not completely scratch-proof, and using knives directly on the surface can leave marks over time.
Corian, while durable, is more prone to scratching and damage.
Sharp objects, such as knives, can easily leave marks on Corian surfaces.
The advantage of Corian is that scratches can often be repaired by sanding down the area, restoring it to its original appearance.
Maintenance and Care
Granite requires a little more maintenance than Corian.
Because it is porous, it must be sealed upon installation and resealed every one to two years, depending on usage.
This helps to prevent staining and damage.
Routine cleaning involves wiping down the surface with a soft cloth and a mild detergent, while heavy-duty cleaning may require a special granite cleaner.
Corian, being non-porous, is easier to maintain.
It does not need to be sealed, and it is resistant to mould, mildew, and bacteria.
Regular cleaning with a damp cloth is usually sufficient to keep Corian in good condition.
However, it is important to avoid placing hot pans or heavy objects directly on the surface, as this can cause permanent damage.
Heat Resistance

Granite is highly resistant to heat and can withstand hot pots and pans without sustaining damage.
This makes it a popular counterop choice for your kitchen cabinets, where heat resistance is important.
Corian, on the other hand, is not as heat-resistant as granite.
Placing hot items directly onto a Corian surface can cause it to warp, discolour, or crack.
Therefore, it is advisable to use trivets or hot pads to protect the surface from direct heat.
Strength
Both materials are strong, but granite is generally considered stronger than Corian.
Granite’s natural composition gives it a significant amount of strength, allowing it to withstand heavy impacts.
Corian, while durable, is less resistant to damage from forceful impacts or heavy objects.
However, its flexibility allows it to be moulded into more intricate designs, which granite cannot achieve.
Longevity
Granite is incredibly long-lasting.
With proper care and maintenance, granite countertops can last for decades, making them a wise investment for homeowners.
In contrast, Corian has a shorter lifespan.
Although it is a durable material, it may require replacement sooner than granite, particularly if it sustains significant damage or wear.
Water Resistance
Corian is fully water-resistant, making it an excellent choice for areas with high moisture, such as bathrooms or kitchens.
It will not absorb water, reducing the likelihood of warping or damage from prolonged exposure to moisture.
Granite, while resistant to water to some extent, is still porous and requires sealing to prevent water from soaking into the stone.
Design
Corian offers unmatched design flexibility.
Since it is a solid surface, it can be moulded into virtually any shape, allowing for seamless joints and custom features.
It is available in a wide range of colours and finishes, which means it can fit into any design scheme.
Granite, being a natural stone, is limited in terms of design flexibility.
While it is available in a variety of colours and patterns, it cannot be shaped or joined in the same way Corian can.
Its appearance is also more natural, with variations that can sometimes be more difficult to control.
Installation

The installation process for both Corian and granite requires professional expertise.
Granite worktops are heavy and may require additional support, especially for large countertops.
Installation can be more complex due to the need for precise cuts and sealing.
Corian, being lighter and more flexible, is easier to work with and can be cut and shaped on-site.
Both materials require professional installation to ensure a high-quality finish.
Cost
Granite is typically more expensive than Corian, both in terms of material costs and installation.
The price of granite depends on factors such as quality, rarity, and the specific type of granite chosen.
On average, granite can cost between £300 and £500 per square metre.
Corian, being a synthetic material, tends to be less expensive, with prices generally ranging between £200 and £350 per square metre.
However, the final cost of both materials will depend on factors such as the design, installation complexity, and location.
Conclusion
When it comes to choosing between Corian and granite, the best worktop depends on your specific needs and preferences.
Granite is an excellent choice if you are looking for a natural, durable material that will last for decades and withstand heat and heavy use.
On the other hand, Corian offers a versatile, low-maintenance option with superior design flexibility and resistance to stains.
Ultimately, your choice will depend on your budget, design preferences, and how much maintenance you are willing to invest in the long term.
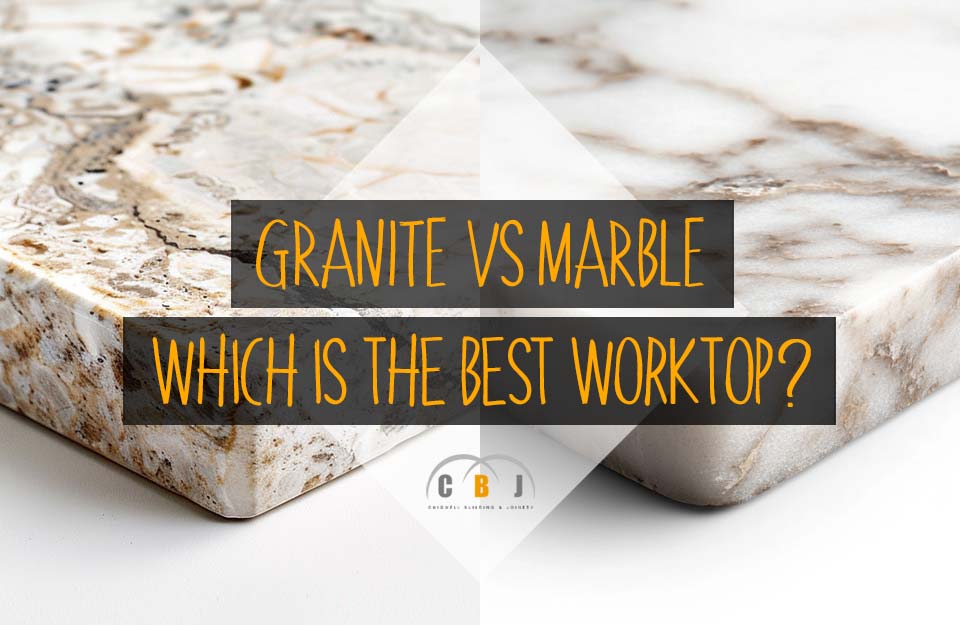
Granite vs Marble - Which is the Best Worktop?
Author Chigwell Building & Joinery
Date 13/02/2025
Granite and marble are two of the most sought-after worktop materials for kitchen carcasses, each offering unique benefits and aesthetics.
Choosing between them requires understanding their properties, advantages, and limitations.
Both materials bring a timeless aesthetic and a sense of elegance to any kitchen.
However, they also differ significantly in terms of durability, maintenance, cost, and various other factors.
In this guide, we’ll explore the key differences to help you determine which material is better suited to your needs.
Table of Contents
- What is Granite?
- What is Marble?
- Key Differences
- Origins
- Appearance
- Imperfections
- Durability
- Stain Resistance
- Marks and Scratching
- Care and Maintenance
- Heat Resistance
- Strength
- Longevity
- Water Resistance
- Design
- Installation
- Cost
- Added Value
- Conclusion
What is Granite?

Granite is a natural igneous rock formed through the slow crystallisation of magma beneath the Earth's surface.
Its composition primarily includes quartz, feldspar, and mica, giving it a granular texture and distinctive speckled appearance.
Granite’s natural origin ensures that every slab is unique, featuring a blend of colours and patterns.
Its hardness and durability make it a popular choice for high-use areas such as kitchens.
Granite is quarried from various parts of the world, including Brazil, India, and Italy, which often influences its price and availability.
Once extracted, the stone is cut, polished, and sealed for use as a countertop material.
What is Marble?

Marble is a metamorphic rock created when limestone undergoes intense heat and pressure within the Earth’s crust.
This process alters its composition and structure, resulting in its smooth, veined appearance.
Unlike granite’s speckled patterns, marble is characterised by flowing veins that provide a more cohesive and elegant aesthetic.
Marble has been associated with luxury and sophistication for centuries, often used in sculptures, architecture, and interiors.
Its softer nature makes it more prone to scratches and stains, but with proper care, it remains a stunning and timeless addition to any kitchen.
Key Differences
Granite and marble differ significantly in terms of their origin, appearance, durability, and more.
While granite is harder and more resistant to scratches and heat, marble is prized for its elegance and unique veining.
Origins

Granite is formed deep within the Earth’s crust from cooling magma, giving it a crystalline structure and speckled appearance.
Marble originates from limestone subjected to immense heat and pressure, resulting in its iconic veining and smooth texture.
Before reaching kitchen countertop manufacturers, both materials are sourced from quarries.
Granite is predominantly mined in countries such as Brazil, India, and South Africa, while marble is often extracted from regions renowned for their deposits, like Italy, Greece, and Turkey.
Quarries use advanced cutting equipment to extract large blocks of stone, which are then transported to processing facilities.
There, the blocks are sliced into slabs, polished to enhance their natural beauty, and treated to prepare them for use as premium kitchen surfaces.
Appearance
Granite offers a broader range of colours and patterns, from subtle whites and blacks to vibrant reds, greens, and blues.
Its intricate patterns and speckles ensure that no two slabs are identical, making each worktop unique.
Marble is often associated with sophistication, thanks to its elegant veining and softer, more uniform colour palette.
White and grey marble are especially popular, lending a classic and timeless look to both modern and traditional style kitchens.
Imperfections
Granite’s granular composition often hides minor scratches and imperfections, making it more forgiving in busy households.
Marble, while beautiful, can showcase its natural flaws more prominently, including variations in veining and slight fissures.
These imperfections are often seen as part of its charm but may not appeal to those seeking a flawless finish.
Durability
Granite is one of the hardest natural stones, making it highly resistant to scratches, chips, and everyday wear and tear.
This durability makes it ideal for high-traffic kitchens.
Marble is softer and more prone to scratches and chips.
It’s best suited for areas where heavy-duty use is less frequent, or for homeowners who are committed to careful maintenance.
Stain Resistance

Granite is more resistant to stains, particularly when sealed properly.
Its dense composition helps prevent liquids from penetrating the surface.
Marble is porous and more prone to staining, especially from acidic substances like wine, coffee, and citrus fruit.
Regular sealing is essential to minimise the risk of permanent marks.
Marks and Scratching
While granite can withstand sharp objects and heavy kitchen use, it’s always a good idea to use chopping boards to protect the surface.
Marble is more susceptible to etching from acidic foods and can show scratches more readily.
Protective measures are crucial to maintaining its pristine appearance.
Care and Maintenance

Both materials require some level of maintenance, but granite is generally easier to care for.
Regular cleaning with mild soap and occasional resealing (every 1-2 years) will keep it in excellent condition.
Marble demands more frequent sealing and the use of pH-neutral cleaners to avoid damage.
It’s best for homeowners willing to invest time in its upkeep.
Heat Resistance

Granite is highly heat-resistant and can withstand contact with hot pots and pans without damage.
However, it’s still recommended to use trivets for prolonged heat exposure.
Marble also offers good heat resistance but is more vulnerable to thermal shock.
Placing hot items directly on its surface could cause cracks or discolouration.
Strength
Granite's composition makes it inherently strong and durable, capable of withstanding heavy loads.
Marble is less robust and may require additional support during installation to prevent cracking or breaking under stress.
Longevity
With proper care, both granite and marble can last for decades.
However, granite’s superior durability often gives it an edge in terms of lifespan.
Water Resistance

Granite, when sealed correctly, is highly water-resistant.
Its dense structure prevents water from seeping in and causing damage.
Marble is more porous and can absorb water if not adequately sealed, leading to potential discolouration over time.
Design
Granite offers a bold, dynamic aesthetic, perfect for modern and eclectic designs.
Its wide variety of patterns and colours provides endless customisation options.
Marble, with its classic veining and soft tones, is ideal for traditional or minimalist kitchens.
It brings a touch of luxury and elegance unmatched by other materials.
Installation

Installing granite requires professional expertise due to its weight and density.
Custom cutting and fitting are also necessary to ensure a perfect finish.
Marble is slightly lighter, but its fragility demands skilled handling during installation to prevent damage.
Cost
In the UK, granite worktops typically range from £80 to £150 per square meter, depending on the quality and rarity of the stone.
Marble worktops are often more expensive, costing between £100 and £200 per square meter.
The price reflects its luxury appeal and the labor-intensive process of extraction and finishing.
Added Value
Both materials can increase the value of your home, but marble is often seen as the more luxurious option, adding a higher level of prestige.
Granite, however, appeals to practical buyers due to its durability and lower maintenance costs, making it a more versatile investment.
Conclusion
When deciding between granite and marble, consider your lifestyle, aesthetic preferences, and willingness to maintain the surface:
- Granite is the best choice for durability, ease of maintenance, and high-traffic kitchens.
- Marble excels in delivering timeless elegance and luxury for those willing to invest in its care.
Both materials are exceptional choices for kitchen worktops, capable of transforming your space and adding significant value to your home.
The best choice ultimately depends on your individual needs and the role your kitchen plays in your daily life.
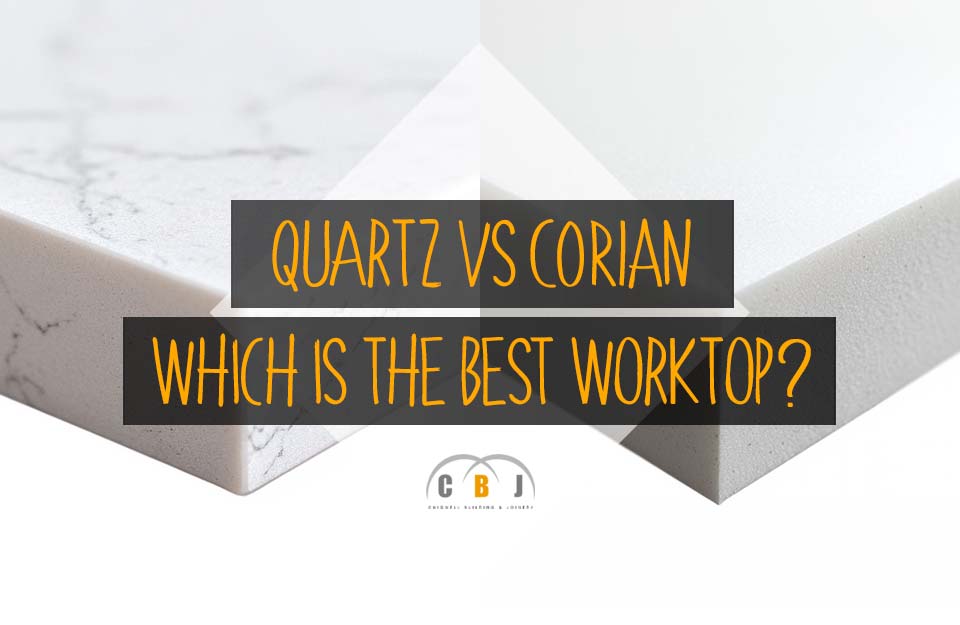
Quartz vs Corian - Which is the Best Worktop?
Author Chigwell Building & Joinery
Date 01/12/2024
When deciding what material to choose for kitchen countertops, there are numerous options on the market, as well as several factors to take into account.
Quartz and Corian are very popular options.
They are both made from natural minerals and binding resins, offering attractive, high quality, durable options.
However there are certain differences worth considering between the two.
Table of Contents
- What is Corian?
- What is Quartz?
- Key Differences Between Quartz and Corian
- Origin
- Appearance
- Imperfections
- Durability
- Stain Resistance
- Mark and Scratch Resistance
- Maintenance and Care
- Heat Resistance
- Strength
- Longevity
- Water Resistance
- Design
- Installation
- Cost
- Conclusion
What is Corian?

Corian® solid surface worktops have become very popular for kitchens.
The brand name has become synonymous with work surfaces as this solid, non-porous material offers numerous advantages.
These worktops are manufactured by DuPont, and are made from engineered stone.
Initially Corian used to be available only in white, but since its inception as far back as 1967, it can now be found in over 100 different colours.
Corian is composed of 66% natural bauxite minerals, and 33% acrylic resins and colour pigments.
These materials are blended and compressed under very high temperatures in order to form slabs of varying thicknesses and colours.
The surface of Corian looks very natural, however while it has the natural beauty and luxurious look of granite and marble, there are no imperfections or fissures whatsoever.
In fact, Corian work surfaces have a consistent colour and pattern throughout the entire slab.
Since it is a non-porous material, it is also very hygienic.
Another advantage of Corian is that it can be joined seamlessly, hence offering a neat look since splash-backs and up-stands appear to be moulded to the countertops.
Corian is also non-toxic and hypoallergenic.
With improved technology in its manufacturing it does not yellow over time, and it is available in a wide range of colours and effects.
What is Quartz?

Quartz is a man-made material widely used for kitchen worktops.
It is made from composite engineered stone whereby natural quartz crystals are bonded with silica, polymers and acrylic resins.
They are compressed at a very high temperature in a process called vibro-compaction, so as to ultimately produce quartz.
Quartz countertops are usually made with 90-95% quartz minerals and 5-10% resin and pigments.
The latter leads to a huge range of colours and patterns being created.
In fact the range of colour and pattern in which quartz is available is very broad and diverse.
Just like Corian, Quartz is a non-porous and hygienic material.
It is also very durable and hard-wearing.
One of the main reasons why quartz is such a popular material is that it is extremely hard and resilient without requiring much effort when it comes to cleaning and maintenance.
Key Differences Between Quartz and Corian
While both Quartz and Corian are known for being premium quality worktops, they vary in a number of aspects:
Origin

Both Quartz and Corian are made from engineered stone.
They comprise natural minerals combined with acrylic binding resins, using very high temperatures.
Colour pigments are incorporated in order to become part of the material, leading to a consistent colour throughout the slab.
Corian was created by DuPont scientists back in 1967.
Thicknesses of Corian slabs are usually in 6mm, 12mm and 19mm.
The surface of Corian derives from bauxite ore, which is a type of sedimentary rock that is both durable and reliable.
Quartz started being used for kitchen worktops around the same time.
It was in 1963 that Italian inventor Marcello Toncelli came up with a method for engineering quartz that he then patented.
Other companies followed suit over the years, with similar compositions to manufacture quartz slabs.
Appearance

Both Quartz and Corian are premium quality, luxurious looking materials.
Quartz contains crystals and as a result it has a unique lustre.
Corian on the other hand appears to be quite similar to marble or granite as it contains speckling.
Their appearance is something that many buyers love because apart from being available in many colours and patterns, both of these materials have that deluxe and rather opulent look which is favoured by many.
Imperfections
Many people prefer countertop materials where no imperfections are evident.
When it comes to natural stone such as granite or marble, natural imperfections are common.
There may be fissures and cracks too.
However with Corian and Quartz, imperfections are not a problem at all as they offer a smooth and consistent appearance throughout.
Durability
Quartz is one of the hardest minerals in the world.
It is very resilient and able to withstand heavy traffic, wear and tear that is common for kitchen worktops.
It is very scratch resistant, and considerably heat resistant too.
Corian is also a durable material, and it can handle constant and heavy usage very well.
However if you were to compare it with quartz, one can say that the latter is somewhat more durable.
Stain Resistance

Since both materials are non-porous, they are highly resistant to stains as well as germs.
There is also no need to seal Quartz or Corian, demonstrating how highly stain resistant both of them are, especially if one were to compare them with other materials used for countertops such as granite.
Mark and Scratch Resistance
The scratch resistance of the material is a key aspect to consider when deciding what material to opt for kitchen worktops.
Quartz is much more resistant to scratches and other marks than Corian since it is harder.
In fact Corian is more easily scratched, and the darker the colour is the more visible the damage will be.
Having said that, at least Corian can be repaired fairly easily as it can be sanded and polished.
Maintenance and Care

Both materials fare very well in terms of their longevity.
Repairs are not something one should worry about as if they are properly cared for, they will literally last a lifetime.
However, Corian is more flexible.
It can be sanded out, polished and hence being easier to repair than quartz would be.
Indeed, only minor repairs can be carried out on quartz.
Little maintenance and care is required for both Quartz and Corian.
Simple regular cleaning with warm, soapy water will suffice to keep them clean with very little effort.
After wiping with soapy water, just rinse and dry the surface and it will remain in tip top shape.
No need for abrasive cleaners or sponges, or special cleaners.
Heat Resistance
Heat resistance is an important aspect to consider.
Quartz fares better than Corian in terms of heat resistance.
In fact it can withstand higher temperatures than Corian.
However, it is important to avoid exposing quartz countertops to very high heat as prolonged exposure can lead to damage.
One can say that Corian is quite heat resistant.
Due to its thermoforming properties it can be moulded in any shape.
Consequently it is important to avoid leaving hot pans on a Corian worktop as there is a high probability of damaging it.
Strength
Both Quartz and Corian are very durable and strong materials.
However if you were to compare them to each other, Quartz is harder than Corian.
Consequently it is less prone to dents and scratches.
Having said that, Corian is still hard and strong, but it has the advantage of offering more flexibility since it can be thermoformed, sanded, shaped, rounded and engraved.
Such actions would not be possible with quartz.
Longevity
Both materials are highly durable, and if properly cared for they will last a lifetime.
The best thing is that neither Corian or Quartz require any special cleaning or a great deal of effort when it comes to maintenance.
Both of them will stand the test of time without much effort on your part.
Water Resistance

Both Quartz and Corian are non porous materials.
Corian is made with a very high ratio of resin, making it completely non-porous, and thus very resistant to stains.
It does not require a sealant.
Moreover, since there are no crevices it is highly hygienic and resistant to bacteria.
Quartz is not completely nonporous but its water resistance is also very good and in fact it does not need to be sealed, unlike other stone surfaces.
Design
Corian is very versatile.
It comes in over 100 colours nowadays, and it can be engraved and thermoformed.
Quartz offers great customisation options too.
The elegant look that both Corian and Quartz offer is something that many homeowners aspire for their kitchens.
Since both materials come in a large variety of colours, patterns and finishes, they are ideal for any preference one may have.
Installation

Installing Corian or Quartz is definitely a job best left in the hands of a professional company.
Besides being heavy to handle, such materials will need to be measured and cut precisely, and installed perfectly on the countertops.
Considering the costs involved to purchase them, as well as the tools that would be required for installation, it definitely makes sense to hire a professional to handle the installation to ensure perfect results.
Cost
Quartz is slightly more expensive than Corian.
This tends to be the case with darker colours.
Indeed, Corian is more affordable than Quartz, which is why it has gained in popularity since its introduction to the market.
Even though both of these materials call for a considerable expense, they offer very good value for money.
One will be making a good investment when opting for either one of them for kitchen countertops.
Conclusion
Choosing between these two beautiful materials may not be that simple as they are both very good options for kitchen countertops.
While Corian is more versatile and available in a vast range of colours and patterns, many feel that quartz is more unique in terms of its appearance.
Moreover, quartz is relatively more durable and fares better in terms of its scratch resistance.
If you intend to place more importance on the appearance and durability factors, then quartz may be the best option.
However if you are set on a specific colour scheme, you may wish to opt for Corian.
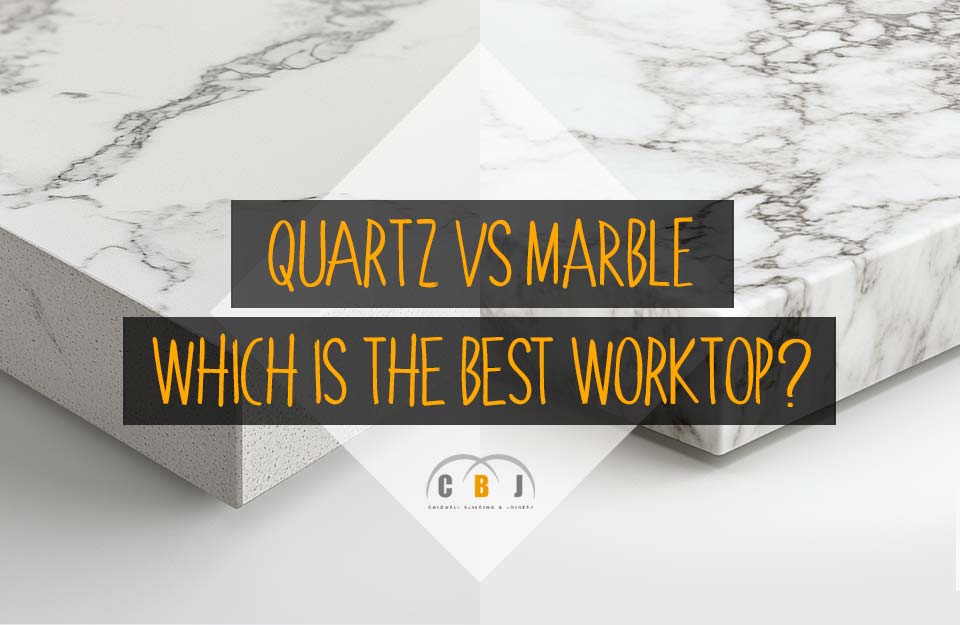
Quartz vs Marble - Which is the Best Worktop?
Author Chigwell Building & Joinery
Date 01/10/2024
Both marble and quartz are very popular for countertops and worktops.
They are aesthetically pleasing and functional materials, and often people are unsure whether to choose one or the other as they have a number of similarities.
In this article we shall be discussing some key differences between quartz and marble to help you distinguish them from each other and make a well informed choice depending on your needs and preferences.
Table of Contents
- Key Differences Between Quartz & Marble
- Origin
- Appearance
- Imperfections
- Durability
- Stain Resistance
- Mark & Scratch Resistance
- Maintenance & Care
- Heat Resistance
- Longevity
- Water Resistance
- Design
- Installation
- Cost
- Conclusion
Key Differences Between Quartz & Marble

Marble is a timeless classic.
This natural stone has been used as a building material for centuries.
From statues to countertops, there is no denying that marble is beautiful, stylish and elegant.
The fact that it comes in numerous different colours and patterns, which all occur naturally is a distinctive aspect of this material.
Marble is also considerably durable.
Quartz on the other hand is engineered, due to the fact that it comprises natural quartz added to polyresin.
It is still very strong and durable, and comes in countless colours and patterns.
You will even find quartz that mimics the look of marble and granite for instance.
When it comes to styles and patterns, quartz offers more options than marble, however one will need to keep in mind that it is not completely natural.
Other key differences between marble and quartz include their porosity and their maintenance.
Let us delve a bit deeper into the various differences hereunder.
Origin

Marble is a natural stone that is created when limestone is subjected to heat and pressure in a process called metamorphism.
Marble mines and quarries are located in areas where marble occurs naturally.
This includes the USA, Greece, Turkey and Southern Italy.
Quartz, on the other hand, is a manufactured material since it comprises around 90% natural quartz combined with around 10% of polymer resin.
It has not been in use as much as marble, since it was not until the 1960s that this manufacturing process was used to create a slab.
An Italian inventor, Marcello Toncelli, came up with this idea and established Breton, and since then quartz has become highly popular for worktops.
Appearance

Both quartz and marble are very beautiful, and they will add value to any home.
Both of them have their unique colour variations, but needless to say since quartz is not completely natural, it offers more specific variations when it comes to appearance.
Marble is a natural stone, and so you cannot change the way it looks.
Quartz has around 10% polymer resin and as a result it has a unique pigmentation.
Therefore the colours and patterns it is manufactured with can be altered and made according to specific preferences.
On the other hand, with marble you can expect to have natural grains, flecks and veins, which make it look far less uniform in appearance than quartz.
Imperfections

Marble is available in a wide range of colours.
However, since it is a natural stone, there may be imperfections which result in variations in the patterns and colours of the slabs.
While this is something that some people do not really care about because they consider it as a key part of marble’s natural beauty, it might be undesirable for others who prefer a more consistent look.
Durability
Both quartz and marble are durable and strong materials.
However, if you were to compare them to one another, quartz ranks as more durable than marble.
This is because marble is more prone to chipping or cracking upon impact.
Marble is more suitable for low traffic areas such as window sills and bathrooms, rather than for kitchen countertops.
Quartz effectively ranks among the hardest minerals.
If you want a truly durable material that is highly resistant to chipping, staining or scratching, then there is no doubt that quartz is far better than marble.
It does not require any sealing or treatments either.
Stain Resistance

As touched upon previously, quartz is far better when it comes to stain resistance than marble.
Marble will easily get stained if juice, oil, coffee or wine is spilled for instance, and hence it is not such a good choice as a kitchen countertop.
Should marble be used for a kitchen countertop, it is a must to protect it with a high-grade sealant to protect it from spills involving acids or chemicals.
Quartz on the other hand is a non-porous material, and consequently it can resist staining very well.
Mark & Scratch Resistance
Just as with stains, marble does not fare as well as quartz.
Due to its soft-core, marble is more prone to scratching, especially if it is rubbed with an acidic medium.
Quartz is much more resistant to marks and scratches.
That is why quartz should be your choice if it is going to be installed in a kitchen or in a high traffic area.
Maintenance & Care

Quartz is undeniably a better choice if you do not want to worry about care and maintenance.
This is due to the fact that there is no need to seal quartz and it is super easy to clean.
Simply wipe with a soft cloth dabbed in mild soapy water, and that’s it!
No need for specialised cleaners or complicated regular maintenance.
Conversely, marble countertops would require sealing in order to prevent staining.
Re-sealing on a regular basis is also highly recommended.
It is also important to invest in specialised marble cleaning products to maintain marble in good condition over time.
Heat Resistance
Quartz is durable, but you need to be careful when it comes to high heat.
Excessive heat could end up scorching the surface of a quartz countertop as it would melt the resin within.
Permanent burn marks could result on the surface, and so you would need to exercise caution and not place hot pots or pans directly onto a quartz worktop.
Longevity
There is no denying that both marble and quartz do well in terms of their longevity as long as they are well taken care of.
They are both strong and durable.
However, in the case of quartz caution needs to be exercised to avoid exposing it to excessive heat as it is not that heat resistant.
On the other hand, in the case of marble it is important to re-seal it to avoid staining, and make sure that it is not scratched.
With quartz you will typically also get a warranty, often ranging from 10 to 20 years.
Some brands even offer a lifetime warranty.
Water Resistance

Since marble is quite porous it will need to be sealed, and re-sealed on a regular basis.
Otherwise it will not fare well in terms of water resistance over the longer term.
On the other hand, quartz is a non-porous material.
Hence its water resistance is one of its biggest advantages.
There is thus no need to seal quartz countertops.
This is also advantageous since it will not harbour any bacteria and there is no need to worry about stains either.
Design
Quartz and marble are undeniably beautiful options.
They are stylish and elegant, and will add value wherever they are installed.
One of the most striking aspects of marble is that as it is a natural material the designs are unique and unmatched.
This may be appealing to some, while for others it could feel as a problem.
In the case of the latter type of customers, quartz may be a better option because the consistency in quartz slabs’ colours and patterns can make things easier.
Over the years, many advancements were made in the manufacturing of quartz in order to come up with original designs that can cater for customers’ diverse preferences.
As a result, new designs are introduced regularly.
Installation

The installation process of quartz or marble is a job that will need to be left in the hands of professionals.
Since the slabs are very heavy it is not a simple task to install them.
Moreover, cutting will need to be carried out precisely, and thus specialised tools will be required.
It is of utmost importance to ensure that the installation is carried out carefully as any incorrect measurements, cuts or fixings will lead to a waste of money as both marble and quartz are rather costly.
Cost
Considering the style and value offered by marble and quartz, it goes without saying that the cost involved is quite high.
Engineered stone such as quartz does not come cheap.
To give you an idea, you can expect to pay between £50 to £100 pounds per square foot, depending on material and finish.
Marble is also costly but it is often slightly cheaper than quartz.
In fact you can look at a price tag between £30 to £75 pounds per square foot.
Having said that you would need to factor in the ongoing costs.
As noted earlier, marble requires much more maintenance than quartz.
It needs to be re-sealed and re-polished on a regular basis.
This is ideally done by professionals and so the costs are not that low, and if the area is large, it will be even higher.
Therefore you may wish to take into account these costs as well, rather than only the costs of purchasing and installing.
Conclusion
There are various considerations that one would need to take into account when deciding whether to invest in a quartz or a marble countertop.
Both of them have several advantages, and there is no denying that they are both great options which will add value and beauty to your home.
The differences we highlighted above will allow you to have a clearer idea about what to look out for in terms of resistance, maintenance needs and appearance considerations.
Ultimately they are all great materials which are unique and beautiful in their own way.

