News

How to Make Floating Shelves Using MDF Boards
Author Chigwell Building & Joinery
Date 08/11/2019
Most households tend to have one thing in common – not enough storage space!
There's just too many items to store into cupboards and closets and consequently, untidy piles of items start to accumulate in all the wrong places.
For those who are keen to keep everything organised and out of sight, practical storage solutions are a must.
For this reason, floating shelves are a godsend.
They can help to alleviate this problem without breaking the bank, without taking up additional floor space, which more often than not tends to be very limited.
Building your own floating shelves is fairly straightforward, and even a beginner in DIY can do a great job.
Here are some guidelines on how to go about making floating shelves using MDF boards, which are practical and affordable.
Read on to find learn more, or use a jump link below to skip to a desired chapter:
Chapters
What You Will Need
You will need basic tools and supplies which will easily be found in any hardware store, including:
- Hammer Drill
- Screwdriver
- Wall Plugs & Screws
- MDF Boards
- Support Timbers
- Tape Measure
- Sandpaper
- Spirit Level
- Paint (optional)
Some of these may be substituted for other tools as may be noted hereunder.

Building the Floating Shelves
Step 1: Planning & Measuring
Start by measuring the space where you intend to install your shelves.
Consider what you will be placing on them so as to decide the space you should leave between one shelf and another.
This is important so that you won’t end up with unutilised wall space, and you would be maximising your storage space on the shelves.
Based on this, you can then calculate how many shelves can fit in that wall space, and their sizes.
Mark the top line of each shelf with a spirit level, and take note of the items you will need based on the number of shelves you will be making.
Bear in mind that for each shelf you will be needing two support timbers for the length and the width of the shelf, and obviously an MDF board in the desired size.
Step 2: Gathering Supplies
Next start gathering the supplies and the tools you will be needing.
As you may see from the list above there are no particularly costly tools and supplies can easily be gathered.
Step 3: Cutting
Supporting timber pieces are important as they will make your project safer and sturdier.
Each shelf will need four pieces, one on each side, and if you wish an additional one in the middle to provide extra support.
This is especially important if you will be placing rather heavy items on the shelf.
Cut your timber pieces according to the number of shelves you decided to build.
MDF boards will probably have been cut for you at the store where you bought them, so there is no need to worry about getting them.
Step 4: Attaching the Support Structure
Floating shelves are best built with a support structure.
The top of this structure should be in line with the top of the upper shelf.
Start by screwing the first part to the back wall of the alcove, always making sure that it is level.
Next start to fit the sides, and finally the front strip will be attached.
It is a good idea to pre-drill the holes in the timber as this will help to avoid any splitting or countersinking.
This process will need to be repeated for each shelf.
Think of this as the frame for your floating shelves.
Step 5: Final Fitting
Then fit the shelf cladding by screwing the bottom cover of the shelf to the supporting structure.
Place the top parts over and screw them for additional safety.
Finally screw the front panels to the shelves.
Step 6: Painting the Shelves
A coating of paint is optional.
Some people opt for this so as to have the shelves complement the rest of the furniture in the room where they are installed.
Others may stick to the natural look of MDF.
In any case make sure to fill in any holes and sand lightly so as to make your shelves look smooth and finished off nicely.

Helpful Tips & Ideas
Since it is a good idea to measure the angles at the sides and the back in relation to the front, it is a good idea to have an adjustable square at hand.
This will ensure more accuracy and ultimately a neater result.
Use the machined edge of the MDF board first as this will be flush to the front batten.
There are different thicknesses of MDF sheets that you could buy.
There is no need to go for really thick ones unless you are going to place considerably heavy items on the shelves.
You might wish to enquire which thickness is most suitable before buying.
It is really helpful to use the top sheet for each shelf as a template for the bottom one.
Attaching the boards to the battens can be done by glue and clamping or by using a nail gun.
Clear any excess and fill in any gaps by using some decorator’s caulk.
This will make things neater.
In the case of any countersunk screws, particularly at the front of the shelves, you can use some filler to hide them off.
Then sand lightly to make it smoother and more flush.
Alternatively, you might wish to attach pine strips to that thickness so as to cover off any defects more neatly.
If you opt for painting the shelves always sand them first.
Keep some wall paint at hand so as to touch up any parts which might have ended up marked while you were installing the floating shelves.

Conclusion
And that’s it!
As you can see it is a really effortless and fairly simple project to build your own floating shelves.
Next start piling them up with that stuff that you had in mind so as to put them to good use!
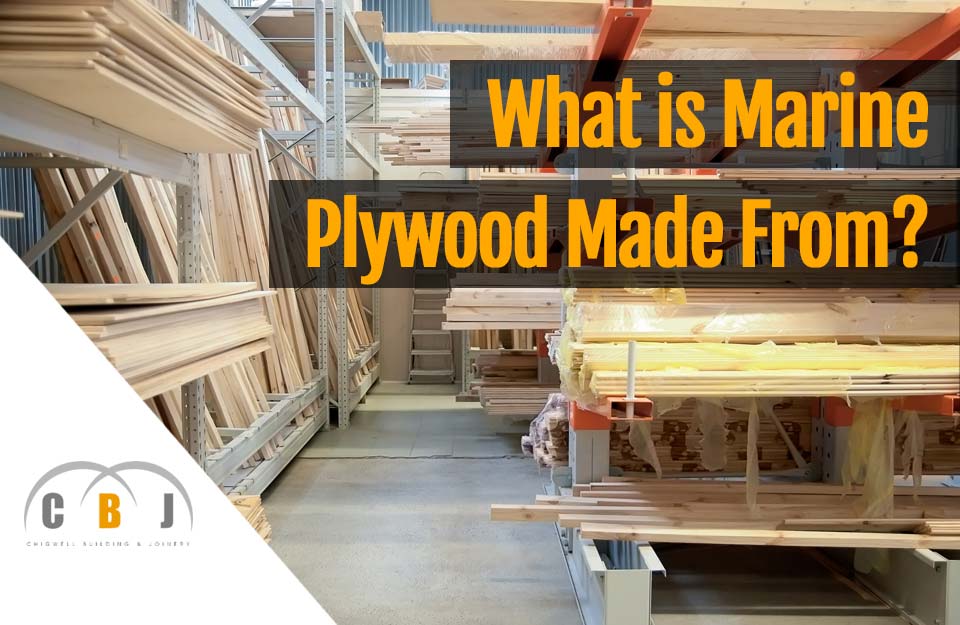
What is Marine Plywood Made From?
Author Chigwell Building & Joinery
Date 08/10/2019
Most people have heard of plywood and will most likely own something made from plywood, such as a piece furniture.
But whilst it's a very commonly used material in the construction and furniture industries, many people are unaware that there are actually different types of plywood available for different uses.
These varying kinds are intended for different uses and purposes, and as a result they have slightly differing properties and construction.
Marine-grade plywood is one such example.
The term marine might give off the wrong impression that it is suitable to withstanding extreme moisture or contact with water.
However, do not be fooled as marine ply not strictly 100% waterproof.
Marine plywood is however, a reasonably high quality type of plywood.
It is constructed from hardwoods rather than softwoods, with each layer affixed using waterproof grade glue to prevent de-lamination.
Consequently, it is often used in exterior construction and outdoor furniture projects, certain types of boat, and it is also considered to be a good choice for use in coastal areas where natural air moisture levels are considerably higher.
So what is marine plywood made from that makes it a much stronger material than regular ply?
Read on to find out more, or use a jump link below to skip to a desired chapter:
Chapters
- What is Marine Grade Plywood?
- What is it Made From?
- How is Marine Plywood Made?
- What is it Used For?
- Is It Better Than Regular Plywood?
- Conclusion
What is Marine Grade Plywood?
Marine plywood is highly recommended for outdoor projects as it is more resistant to moisture than other types of plywood.
However, it is still made in the same manner as any other plywood sheets you'll find on the market, as it is still constructed from thin veneers of wood sealed together under high pressure.
In the case of marine plywood, that bonding agent is made for water submersion.
Like other types of plywood, marine plywood is also given different standardisations by manufacturers.

What is it Made From?
Marine plywood is constructed from water resistant tropical hardwood, and as these are naturally water resistant, they make marine plywood better than other types of plywood in situations where moisture levels are higher.
There are certain wood species, such as cedar, cypress and redwood, Western Larch or Douglas Fir, that have a natural resistance to decay.
Whilst marine plywood is not pressure treated to enable it to withstand decay, high quality grade veneers are used to increase its resistance.
As a result of this, it is made to withstand moisture far better than standard plywood as it will be well protected with water resistant materials.
How is Marine Plywood Made?
Marine plywood is available in different grades namely:
- A-A
- A-B
- B-B
- MDO
- HDO
As with other types of plywood, marine grade plywood is composed of thin sheets of wood veneers, which are arranged in perpendicular layers so as to make it stronger.
Cross lamination is used so as to have the plies perpendicular to each other, so that the panel will be given additional strength in both directions.
Finally, the panel is bonded under high heat and extreme pressure.
When it comes to marine plywood, waterproof glue is used to bond the layers, making it ideal for use in areas where humidity levels or moisture is higher than normal.
Due to the waterproof glue, you do not need to worry about the layers de-laminating over time.

What is it Used For?
Marine grade plywood is good for exterior use, and as a result it is recommended for various projects such as external structures and outdoor furniture.
Some of the most popular uses of marine plywood include:
- Patio furniture: such as benches, tables and chairs.
- Pergolas: could very well be constructed from marine plywood, as it is a feasible but inexpensive option compared to other types of wood.
- Planters: ideal as marine plywood can withstand the moisture and humidity from the soil.
- Porches and Decks: a good staining and sealing, and you can have a great deck or porch made out of marine plywood.
- Boats and Sailing Equipment: there are basic boats for sale made from marine plywood, which will serve well for those who have fishing or sailing as a hobby. Marine plywood is ideal to form simple boat structures, and as long as it is properly sealed inside and outside, it will be waterproof.
- Boat Docks: marine plywood is taking over the traditional sanded lumber to construct boat docks as it can do well for quite a long time. After some years, its longevity can be increased further with some weatherproofing treatment.
- Lake Platforms: building a lake platform where you can fish and suntan is a great idea, and using marine plywood to construct it is ideal. All it takes is gluing several marine plywood sheets together, protect them using a waterproof sealant, and bolt it to a weight at the bottom of the lake.
- Bathroom and Kitchen Walls: kitchens and bathrooms are the rooms whose walls are most susceptible to splashes. Marine plywood is ideal as it can withstand such moisture quite well.
- Bathrooms and Kitchen Subfloors: spills on bathroom and kitchen floors, and overflows from showers and toilets are common, but with marine plywood sub-flooring you can be safeguarded from deforming and rotting floors.
Is It Better Than Regular Plywood?
In short, marine plywood almost always performs better than regular plywood.
The main reason is that it can better withstand humidity and moisture, unlike the most basic type of plywood which would end up warping should it be exposed to high levels of humidity or moisture.
The main difference is that marine plywood, and exterior types of plywood, will be better sealed and treated.
On the other hand, plywood used for interior projects will be thinner.
To give you a basic idea, regular plywood sheets would typically have between three and five layered veneers, whereas marine plywood would typically have twice as many layers.
Despite this, never forget that at the end of the day this is still plywood, and though it is of a better quality, you should still make sure that it is well maintained from time to time.

Conclusion
If you are considering purchasing plywood for an outdoor project, or constructing something that will be used outdoors or placed in areas of high humidity, then it is highly recommended that you opt for marine ply.
This is because it is more suitable to withstand high humidity and moisture since it is bonded together with waterproof glue or phenolic resin.
The combination of water resistant hardwood that this plywood is made from, and this type of glue, will basically make this plywood waterproof and last longer.
Marine ply is also extremely strong and can withstand high levels of pressure.
So it makes for an ideal building material in a wide range of projects and applications.

How to Choose the Right Plywood for Various Projects
Author Chigwell Building & Joinery
Date 05/09/2019
Plywood is a popular building material because it is relatively affordable, yet very sturdy and durable.
There are however a number of different varieties of plywood, so knowing which type to use for various applications is essential to prevent problems occurring later on.
In this article, we explore the various types of plywood available and how best to use them.
Read on to find out more, or use the jump menu below to skip to your desired chapter:
Chapters
- How is Plywood Made?
- Grades of Plywood
- Plywood for Furniture
- Plywood for Exterior Use
- Plywood for Water Exposure
- Plywood for Walls
- Plywood for Flooring
- Cutting Plywood
- Key Takeaways
- Conclusion
1. How is Plywood Made?
Plywood is made out of thin sheets of wood veneers.
With many of these pieces pressed together using high temperatures, plywood is manufactured.
There are different types of plywood, as well as thicknesses.
Their uses vary depending on this, and a type of plywood may be more suitable for a project rather than another.
It is important to consider the type of project you will be using plywood for, especially in terms of the strength requirements, where the finished product will be placed and used, and more importantly, exposure to the elements.
2. Grades of Plywood
Plywood is classified according to its thickness, appearance and condition.
These factors determine the grade of the plywood, such as:
A Grade
This refers to plywood that is smooth, and with few imperfections. This grade of plywood does not have small knots either. Thus this is high quality plywood. This type of plywood is thus ideal if you intend to paint it.
B Grade
This is plywood that is still of a relatively good quality. Typically such plywood will have small knots and possibly some nicks.
C & D Grade
When plywood is graded C or D, it means that it is of a relatively low quality.
There will be several knotholes and defects in it, as well as void areas.
This type of plywood can still be used if your main objective is to save money, and when it will be used in a project where it will be used in interior parts, or when it will be covered up, and so imperfections will not be visible.
Softwood vs Hardwood Grades
It is important to consider the difference between softwood and hardwood grades of plywood.
Softwood plywood refers to plywood in which the face and back veneers are composed of soft types of wood. These include cedar, pine and Douglas fir.
These are then graded as noted above, from A to D.
Hardwood plywood on the other hand is of a higher quality and it is the most ideal choice if aesthetics are important for your project.
Birch and oak are most commonly used for the hardwood veneer faces.

3. Plywood for Furniture
Plywood is often used for manufacturing furniture, especially furniture fronts like the drawer fronts and the cabinet tops.
The lower grade plywood is used for the interior parts of the furniture, and the higher grade is used for the outer parts where a more attractive veneer is desired.
This helps to save a bit on money, as well as reduce the weight of the furniture.
Plywood is very popular when building shelving units, wall units and cabinets.
4. Plywood for Exterior Use
If you intend to use plywood to build something that will be used outdoors, it is important to choose high grade plywood which is suitable for exterior use.
You need to bear in mind that since plywood is made from several layers of veneer glued together, it is not ideal to have it exposed to moisture.
Exterior plywood will have been manufactured using water-resistant glue, and it is thus more resistant.
This type of plywood is not graded from A to D, but instead a letter X is used to show that it was made with exterior glue.
5. Plywood for Water Exposure
Plywood is graded so as to allow you to make a well-informed choice, depending on how and where it will be used.
Apart from the grading ranging from A to D, plywood is also classified by the following categorisations, which reflect its resistance to water:
Exterior
This is plywood where fully waterproof bond glue has been utilised to glue the layers to each other, making it the best and most sturdy type of plywood in case of high levels of moisture.
Exposure 1
Still sturdy and able to withstand water exposure but it is not to be used for permanent exposure to weather as it is not as resistant as the former.
Exposure 2
Features an intermediate bond, making it ideal for interior use where the plywood will be protected, and only low levels of water exposure are expected.

6. Plywood for Walls
If you will be using plywood for walls, it is best to go for construction plywood.
This is exterior grade plywood, which is able to withstand weather exposure.
You want peace of mind when you use plywood for walls, and you do not want exposure to weather to affects the integrity and safety of the walls.
7. Plywood for Flooring
Plywood is often used for flooring projects.
You need to ensure that your floors are both durable and safe, and so you should opt for plywood that is of a high quality.
Floors typically consist of a number of layers.
Floor underlayment it typically made from 5/8” plywood sheets, whereas the subfloor which sits below it is made from thicker plywood of at least ¾”.
8. Cutting Plywood
When using plywood it is important to make sure that you cut it correctly. You will need to use the most adequate type of blade.
Here are some tips to bear in mind:
- Always cut plywood with the good side down
- Cut along the scrap side
- You may wish to invest in a plywood cutting blade
- Always set the depth right, and ideally make use of some extruded foam as backing
Key Takeaways
If you want to save money and still have an aesthetically pleasing piece of furniture, or sturdy walls and floors, there is no need to look any further.
Plywood is a very popular choice for these and various other projects too.
It is widely used in woodwork and construction, and it is a favourite among DIY lovers.
The fact that it comes in different thicknesses, and that you can choose from various classifications, allows you to make the right choice as you will be using plywood that is most ideal for your needs, and according to the weather exposure and moisture resistance expected.
Conclusion
Plywood is a versatile and affordable material that can be used for interior, as well as exterior and structural applications.
Thanks to plywood quality grading and classifications, you can choose wisely and increase your chances of having plywood that is ideal for your intended project.
You can thus save money as well as increase the longevity of the project.
How to Prime MDF Boards for a Smoother Paint Finish
Author Chigwell Building & Joinery
Date 08/08/2019
Priming and sealing is always recommended before you start painting MDF boards.
If you prime the MDF before painting, you will get a far better and neater finish.
This is because the paint finish will be smoother due to the underlying base coat.
Besides you will be able to prevent any distortions, especially as a result of swelling.
Let's look at what you should do step-by-step in greater detail.
Continue reading to find out how, or use the jump links below to skip to a chapter of your choice:
Chapters
- Sealing MDF Boards Edges
- Sealing MDF Boards with Drywall Sealer
- Sealing with Glue Based Primer
- Sealing MDF Board Surfaces
- Sealing with a Paint Primer
- Sealing with a Spray-on Lacquer
- Sealing with PVA Glue
- Sealing with an Enamel Primer
- Preparing, Priming & Painting MDF Boards
Sealing MDF Boards Edges
First of all, you should make sure to seal the edges of the boards well.
The surfaces also need to be sealed, especially since MDF is prone to moisture, which in turn causes swelling and splitting.
Sealing will also be critical if you intend to use water based paints.
Pay special attention to the edges as this is where the MDF board will be absorbing the paint most heavily.
And in case there are any routed details apply more sealer.
There are different kinds of sealer that you can use, including acrylic or drywall paint sealer, or oil based primer, or glue based primer.
Sealing MDF Boards with Drywall Sealer
Rub a coating of this primer into the edges of the boards.
Then wipe for a more even result, and sand the areas.
Sealing with Oil Based Primer
Apply onto the edges and leave to dry well. Then sand them down.
Sealing with Glue Based Primer
PVA glue can be spread as a thin layer over the edges of the boards.
A glue spreader can be used to do this more easily, or else you could apply it with an airbrush.
Just try to make sure that the layer is as smooth and as even as possible.
Do not allow any build ups.
Once it has dried well you can sand it lightly, paying attention to avoid sanding through the glue coating.
Sealing MDF Board Surfaces
The surface area of the boards can be sealed with different products, namely:
Sealing with a Paint Primer
Buy a paint primer that is suitable for MDF.
These primers are solvent, not water based.
These could include enamel or lacquer.
Pay attention when applying as these primers are rather thick, and in case you need to retain certain details they may not be ideal.

Sealing with a Spray-on Lacquer
Choose a clear or a coloured spray lacquer that is suitable for exterior finishes for best results.
Always follow the instructions on the product, and work in a well ventilated area.
Sealing with PVA Glue
Applying thin layers of PVA glue is another option.
Dilute with water so as to attain a thinner layer, or else opt for acid neutral PVA glue which is used for bookbinding as this can be easily applied.
In fact you could either use a roller or a spreader to apply it onto the boards, or else a spray bottle that is suitable for thinner glues.
Sealing with an Enamel Primer
The most important thing is to apply thin coatings.
Bear in mind that while applying it will be drying up rather quickly, and so you need to avoid having any build-ups accumulating.
Running and dripping will lead to an untidy result.
Make sure to choose a colour that will work well underneath the final coat.

Preparing, Priming & Painting MDF Boards
Once you choose which product to use for priming, follow these steps:
- Lay the MDF boards flat
- Wear gloves and start applying the primer on the edges of the boards first.
- Allow to dry well.
- To sand it is recommended to attach a sanding pad onto an oscillating tool, and fasten a sandpaper over it. Sand the edges you just primed.
- Then, sand lightly the surface area of the MDF boards so as to remove any fuzzy fibres which may be on the surface. This is common since MDF is ultimately a wood product composed of wood fibres packed up densely together.
- Wipe the surface of the boards with a rag to remove dust residue. Then use a tack cloth to get rid of any remains more effectively.
- Now you can start to apply the primer onto the surface area. Depending on the primer product you chose, you could use a spray bottle or a paint roller. Always spread evenly and as smoothly as you can. Wipe away any drops or running immediately.
- Allow the primer to dry thoroughly.
- Then, you can move on to the painting process.
Painted MDF looks much better, but it is important to prime it and sand it first.
Apart from a more aesthetically pleasing result, it will also increase its lifespan, as it is a type of material which easily absorbs water.
It is not difficult or time consuming to prime MDF boards, and you won’t need to sand it extensively either.

How to Design a Practical Fitted Wardrobe
Author Chigwell Building & Joinery
Date 09/07/2019
Wardrobes have a tendency of being always piled up with clothes, and various other items.
For many people it is a problem to fit newly bought items in their wardrobe, and yet, new clothes and accessories need to be bought and stored somewhere!
So, if you are facing this kind of problem, why not try to make the best use of space by opting for a fitted wardrobe.
This will help to gain more storage space and be able to store more items.
Unfortunately it is common for people to have poorly designed wardrobes which do not make proper use of floor space and wall space.
If you would like to start afresh, we hope that the following guidelines on how to design a practical fitted wardrobe or closet will guide you to make good choices.
Read on to learn more, or use the jump links below to hop to a chapter that interests you:
Chapters
- Evaluate Your Needs
- Organisation is Key
- Ergonomic Design
- Drawers or No Drawers?
- Add Extra Storage
- Smart Shoe Storage
- Avoid Unnecessary Spending
- Be Flexible & Practical
- You Don't Have to Fit Everything!
Evaluate Your Needs
It is important to start by planning carefully.
Consider your needs, the number and types of items you need to store away in the wardrobe, and the space available in that room.
If you have a completely blank wall at your disposal, it might not be really necessary to use it all up.
First of all it will end up being unnecessarily costly, and you might even end up with unused space within the wardrobe.
That space could have been left for other furniture, decorations or simply floor space for more spaciousness.
So, you should try to ascertain the storage space that you really need.
This includes planning the hanging space you require, and the number and types of shelves.
Organisation is Key
You may be amazed at how much space you could end up saving, and making, if only you organised your clothes and any other items properly.
It is highly recommended that you take the time to group clothes according to size, so that you do not waste space when they are tucked away together in the wardrobe.
Also, consider the best height for the top rod.
The higher this rod is the more space you will then have to store underneath it.

Ergonomic Design
How often did you end up on the floor rummaging through items stored at the base of your wardrobe?
How much bending down did you end up doing?
Unfortunately this is a common problem with many who fail to take into account the importance of designing a wardrobe ergonomically.
An ergonomic design will not only prove to be more practical and convenient, but it will also enable you to find things more easily while keeping your wardrobe neat and tidy.
These are some smart tips you should bear in mind:
- It is best to place shelves right above hangers to gain more storage space.
- Shelves should be positioned about 10 inches apart.
- It is also recommended to have shelves which are not more than 14 inches deep as otherwise you will end up having items falling at their back.
- When a shelf has a width of 12 inches it is generally the best option as most folded clothes will fit nicely and tidily in that space.
Drawers or No Drawers?
Funnily enough while drawers may give the impression of helping you be more organised, in many cases they end up being a big no no with wardrobes.
First of all drawers take up a considerable amount of space which would have been more spacious if it had been left for a normal wardrobe door.
In fact if you were to think of it you would notice that drawers in reality restrict the wardrobe layout and waste space.
Only small items can be stored in drawers.
These include socks, underwear, and scarves.
All of these could be more easily stored in bedside tables or dressers.
Any folded clothes like sweater and t-shirts will also fit more easily and neatly on an open shelf rather than inside a drawer.
You would also be able to see them more easily.
Also, drawers end up increasing the costs involved to build a wardrobe.
So in reality they might as well be avoided.
Add Extra Storage
If you have a relatively small space you will need to use every storage possibility to the full.
In these cases it is recommended that you avoid folding clothes, but rather stick to hanging them.
A deep space in a wardrobe is best used for hanging clothes, rather than folded clothes which you cannot access easily because they end up falling towards the back.
A practical option is to include deep drawers underneath beds.
These can be used for shoes. Drawers should be left to other furniture such as a dresser, where they can accommodate small items like underwear and socks.

Smart Shoe Storage
For small rooms avoid storing shoes inside your wardrobe.
If however you want to cram them inside your wardrobe make sure to opt for a practical way to do so.
Shelves for shoes should be at mid-height so as to enable you to see them easily.
Shelves which slide out can be very convenient for shoes.
Also shelves used for shoes do not have to exceed 12 inches in depth.
Avoid Unnecessary Spending
While shopping for the material needed to build your practical fitted wardrobe you might be tempted to buy accessory storage devices.
Instead of spending a considerable amount of money on these supposedly innovative storage options you would do better with racks.
These can allow you to make good use of space and they are ideal for ties, belts and scarves.
Be Flexible & Practical
Try to make your wardrobe as adaptable as possible.
Different seasons call for different clothes and accessories.
So, why not do away with shelves for a while so as to use hanging rods.
As long as the holes for the rods can be used for the shelf supports, you can change from one to another easily.
Top shelves will come in handy to store off-season clothes and gear.
You Don't Have to Fit Everything!
While the wardrobe is the biggest furniture piece in your home, avoid being tempted to tuck away everything in it.
There are other rooms and other furniture at home.
So invest in simple shelving systems for other rooms in your home to store certain items there.

