News

10 Best Ways to Update Old Fitted Wardrobes
Author Chigwell Building & Joinery
Date 02/09/2020
Built-in wardrobes help us to maximise storage space, and since they are custom made for the specific room, they usually look great.
However over time your fitted wardrobe might start to look a bit old fashioned and dated.
If this is the case, you might wish to give it a more contemporary look without having to completely replace it for a new one.
Here are 10 great ideas on how you can spruce up your old fitted wardrobe.
Read on to find out more, or use a jump link below to skip to a desired chapter:
Table of Contents
- Add Mirrors to the Wardrobe Doors
- Add Decorative Trimmings or Panelling
- Painting
- Change the Handles
- Upgrade the Interior
- Sliding Doors
- Integrate a Bed into the Wardrobe
- Opt for an Open Facade
- Add Drapes or Curtains
- Go Up, Up, Up!
- Conclusion
Add Mirrors to the Wardrobe Doors

Your old wardrobe might be made from old fashioned laminate, melamine or chipboard.
With scratches and dents here and there, you might want to consider adding mirrors over the doors to conceal any damage or unsightly marks.
By doing so you will be able to hide these imperfections, while also giving a whole new look to your wardrobe.
It is not difficult or costly to have mirrors installed on your wardrobe doors.
Mirrored doors look modern and they also add more light to the room due to their ability to reflect light.
Add Decorative Trimmings or Panelling

There are several types of trimmings and timber mouldings you can find at hardware stores.
You will be able to choose from different styles, and in most cases they are really affordable too.
Simply adding some strips of moulding can literally change the whole look of your wardrobe doors.
Painting

If the surface material of your wardrobe allows, you might wish to paint it.
You can do this fairly easily yourself, and it is not costly either.
You can choose from various colours, and naturally you will be able to make your wardrobe look like new with a fresh coating of paint.
Make sure to choose suitable paint that is ideal for this project and use a good quality undercoat to ensure the paint binds correctly.
The paint should thus have good adhesive qualities and it should not chip easily.
Change the Handles

Door handles may seem like an insignificant detail on wardrobe doors, but in reality if you were to change them they can make a considerable difference to the wardrobe’s overall look.
Simply changing the door handles can renovate the wardrobe and you would not have spent much.
Nowadays there are a variety of door handles to choose from and you can choose door handles that can complement the soft furnishings or other elements in your bedroom.
Upgrade the Interior

Built-in wardrobes are intended to make the best use of the space available and to offer practicality according to one’s needs and preferences.
Over time you may need the wardrobe to serve different purposes.
For instance, instead of having all the interior space reserved for hanging clothes and garments, you may wish to have part of the wardrobe offer integrated shelving or perhaps pull out drawers.
Such changes would require a professional cabinet maker to be carried out, but you will definitely not be spending as much money as having to replace the entire wardrobe.
Sliding Doors

Sliding doors are commonly found on many modern and contemporary design wardrobes these days.
To renovate your old wardrobe you could replace the current doors with sliding doors.
These can literally make your old wardrobe look like new.
Custom made sliding doors can be made in different materials and colours, or you may wish to consider doors made with glass, which look very nice with sliding doors.
You could opt for clear glass, frosted glass or mirrors.
Moreover, sliding doors help to add more floor space to a room.
Integrate a Bed into the Wardrobe

A common option with modern bedrooms these days is to incorporate the bed within the wardrobe unit.
This can be done with some planning and as long as you have a carpenter or cabinet maker see to it.
Besides giving a whole new look to the wardrobe you will also be saving up some floor space. So this is an ideal option for small bedrooms.
You can be creative when it comes to the bed’s headboard too.
You could incorporate shelving within the headboard, or a compartment that closes or slides to store away those small items you are tempted to leave scattered across your bedroom!
Opt for an Open Facade

A less common option, but which looks really great especially if you have a large bedroom, is to opt for an open faceted wardrobe.
This basically requires you removing the wardrobe doors completely.
By adding more shelves and some drawers you would be revamping the wardrobe’s look.
Naturally one would want to be as organised as possible if this option is chosen.
Add Drapes or Curtains

Another option which many barely even think of or consider is to use drapes or curtains instead of traditional doors.
Covering up the wardrobe with modern fabric adds a soft touch to the room.
Obviously you would be complementing them with other curtains you have at the windows and any other soft furnishings in the room.
Go Up, Up, Up!

Old fashioned wardrobes rarely go all the way up to the ceiling.
On the other hand, modern wardrobes are designed to make the best use of the vertical space in a room.
So if your current wardrobe allows, you may wish to build an extra addition on the top section, so that you give it a new design, and also add more storage space capacity.
Conclusion
As you may see there are various ways in which you could give a completely new look to your old fitted wardrobe.
Some options may be more suitable to your wardrobe or bedroom than others.
Your space considerations and the usage requirements for your current lifestyle will also impact the decision that you make.
Regardless of the choice though, there are various ways to go about updating your old fitted wardrobe.
You could also use more than one of the above methods, such as painting the doors, changing the handles, and adding different compartments such as drawers or shelves in some parts.
Be creative and make the changes!

15 Inspiring Wardrobe Design Ideas For Your Bedroom
Author Chigwell Building & Joinery
Date 04/03/2020
Your bedroom is a key room in your home.
Among the most important furniture items in your bedroom is your wardrobe or closet.
It is the main place where you get to store your clothes, and countless other items.
A common problem or tendency is to avoid giving the importance the wardrobe deserves.
Considering that it takes up practically a whole wall in your bedroom, it is going to be eye-catching to say the least.
Therefore it is important that you make sure to consider the way your wardrobe will look, as well as how it is going to affect the ambiance of your bedroom.
For this reason, we’re going to outline the following 15 inspiring design ideas for wardrobes that will enhance the look of your bedroom.
Read on to find out more, or use a jump link below to skip to a desired chapter:
Table of Contents
- Mirrored Doors
- Sliding Doors or Panels
- Built-in Cupboards
- Integrated Bed
- Melamine Wardrobes
- Multifunctional Wardrobes
- Transparent Cupboards
- Incorporated Drawers
- Sleek Designs
- Glass Screens
- Narrow Wardrobes
- Laminated Doors
- Vintage Look
- Solid Wood Wardrobes
- Conclusion

Mirrored Doors
Mirrored wardrobe doors will work wonders on the way your bedroom looks.
They are especially recommended when the bedroom is rather small because with the mirrors effect it will look more spacious.
Sliding Doors or Panels
This is a rather modern design feature for wardrobes.
Instead of traditional doors that open with hinges, shifting doors or panels make wardrobes look sleek, as well as reduce the need to use up precious floor space whenever the door is opened.
So they are aesthetically pleasing as well as great for space saving.

Built-in Cupboards
Instead of sticking to a simple design where the wardrobe is solely made from doors, you might consider including a built-in cupboards.
These could be made from different materials too, making it stand out even more.
Integrated Bed
Another interesting design idea is to have the bed incorporated in the lower part of the wardrobe.
In this way the wardrobe is really easy to access, and you would also be saving up floor space too.
Melamine Wardrobes
Fibreboard is a great material for those who want their wardrobe to look modern as well as be lightweight.
Many people hate having a bulky looking wardrobe which engulfs the rest of the furnishings.
Fibreboard is an ideal option in such a case.
Besides it comes in various colours, including natural tones too.

Multifunctional Wardrobes
Your wardrobe could look really modern if you incorporate additional functions within it, such as a chest of drawers, or a TV unit.
Nowadays having a desk within a wardrobe is also a popular option especially in children's and teens’ bedrooms.
In such a way they would be able to use their bedroom as a study room, or simply to use their laptop or tablet more comfortably.
Transparent Cupboards
If you are very organised you might wish to consider having the wardrobe doors or cupboards made from a transparent material.
The interior of the wardrobe and the items stored within will then be visible.
This makes it look really original and modern.
Incorporated Drawers
Instead of having the wardrobe composed of only doors, you might wish to allocate a part of it to drawers.
This could be in the middle section, or at the ends of the wardrobes.
This idea does not only look nice, but it is also a practical idea as you may store smaller clothes such as socks and scarves more neatly in the drawers, rather than on shelves.
Sleek Designs
Contemporary decor is mainly all about sleekness.
So, if you opt for a sleek closet instead of traditional doors in wardrobes, you will achieve a modern look.
Glass Screens
Another popular option is to use glass (clear or frosted) for the wardrobe doors.
With a unique look, glass doors will make the wardrobe look lighter as well as sleeker.
This is a great option for those who are looking for a contemporary design idea.
Narrow Wardrobes
Instead of having the typical width wardrobes which are generally made nowadays, you could opt for a narrower width wardrobe.
These are obviously going to have a smaller storage capacity but they make the wardrobe look sleeker and very modern, taking up less floor space.
This is an ideal option for those who are more concerned about achieving a modern look instead of focusing on maximising storage space.
Laminated Doors
Using lamination sheets on wardrobe doors will allow you to give a whole new look to your wardrobe.
Laminated doors can be easily achieved thanks to the application of lamination sheets made in any colour, pattern or texture you fancy.
This is surely a great way to make a wardrobe look modern, as well as add some colour to your bedroom.

Vintage Look
For those who prefer a more traditional look, you might prefer a vintage wardrobe.
Such wardrobes are typically not ideal for small bedrooms since they are not the best at space saving and practicality.
This is because you will usually find such wardrobes to be of a lower height, and not flush against the floor or ceiling.
However, they do have a unique charm about them, and if you are all about a classic look a vintage wardrobe is surely a great option.
Solid Wood Wardrobes
There are those who prefer sticking to a classical look, and in that case a wardrobe made from solid wood is the way to go.
Apart from looking sturdy and robust, such wardrobes will also be truly durable and able to hold considerable weight.
With solid wood you would also be able to have decorative elements added to the design of the doors.
Custom Painted Wardrobes
Decorative additions such as stencilling could make your wardrobe look more original and personalised.
You can be as creative as you like with this!
This is surely a great wardrobe design idea for children's bedrooms, as well as for those who would like to make their bedroom look more colourful.
Conclusion
Your wardrobe does not have to be that huge, bulky furniture piece.
You can find ways to make it look more unique and original, while adding flair to your bedroom.
As has been noted in the above design ideas, you can be creative both from a classical or a contemporary perspective.
The sky is your limit when it comes to design ideas, and this includes colours as well as materials.

How to Make a Platform Bed with Nightstands
Author Chigwell Building & Joinery
Date 04/02/2020
The bed is one of the most important pieces of furniture in any home.
It is the focal point of the bedroom, and obviously it is where you want to feel comfortable and rest every night.
Therefore your bed needs to be both practical as well as aesthetically pleasing.
At times ready made furniture does not always suit your needs and preferences.
You end up going from one furniture store to another, but you are still not convinced with what you find.
It could be due to the design, or the hefty prices often charged.
So why not consider making the bed of your dreams yourself?
By following the steps and guidelines below you can make your own platform bed with floating nightstands.
This is a popular idea lately since the nightstands are basically incorporated with the bed itself, thus making it look more contemporary while saving space.
Read on to find out more, or use a jump link below to skip to a desired chapter:
Table of Contents
- Tools & Materials
- Initial Cutting & Sanding
- Painting & Varnishing
- Assembling the Headboard
- Making the Night Stands
- Building the Bed Base
- Finishing Up
- Conclusion
- See It Built!
Tools & Materials
You will need the following tools:- Workbench
- Clamps
- Dowel Jig
- Pocket Hole jig
- Drill
- Jigsaw
- Mallet
- Wood Glue
- Mitre Saw
- Orbital Sander
- Sandpaper
- Framing Square
- Combination Square
- Screwdriver
- High Density Foam Roller
And the following materials and supplies:
- Lumber
- 3 Sheets of Plywood
- Screws
- Inserts to Mount the Nightstands
- Corner Braces
- L-Brackets
- Danish Oil
- Paint
Initial Cutting & Sanding
One of the most demanding tasks of building a DIY bed is cutting the lumber in the required pieces.
You will obviously need several parts which will then be attached to each other until the bed frame is formed.
For this reason it is recommended that you have a miter saw, as it will make the cutting job considerably easier and quicker.
If you do not own one you might check if you can borrow or hire one from the hardware store.
You will need 16 lumber pieces which will be used for the bed frame, the headboard and the bed trim.
Next, cut another piece measuring which will be used for the top and bottom nightstands.
Once all the cutting is completed, you should sand each piece so as to make it smoother and neater.
Since there are several pieces an orbital sander will make it easier and quicker.
Painting & Varnishing
Once all the pieces have been cut, it is best to paint them and varnish them at this point.
This will ensure that you paint them properly and neatly, instead of trying to move around edges when they have already been mounted and attached in a frame.
For the paint it is best to apply it with a high density foam roller as it will give you a neat result.

Assembling the Headboard
The headboard is one of the most important parts of the bed, and one’s eyes are drawn to it more than anything else.
It is best to have someone help you to hold the headboard while you assemble it and attach it to the bed base.
The design of the headboard can be as simple or as intricate as you wish.
For a platform bed it is best to stick to a linear look to complement the more modern look of this kind of bed.
You could opt to carry the wood slightly outward across the entire length, or else leave it smooth and linear throughout.
As a safety precaution, since you will be working close to the edges of the wood, pre-drill the holes for the screws to avoid splitting problems.
Add screws at least every 24 inches or so for more sturdiness.
Making the Night Stands
The nightstands are the smallest parts of the platform bed, and yet they are focal points.
Apart from offering a good place where you can store items neatly in their inner space, and even have the electrical outlets hidden away in that area too.
So the nightstands will be a really practical addition, while also make your platform bed more aesthetically pleasing.
To build the nightstands it is not that difficult.
You will already have cut the pieces of lumber for them earlier.
Now all you need to do is attach them to each other with wood glue and screws so as to form a box, which will have the inner part open.
This is basically going to be like a shelf but since it is tucked away within the outer parts of the nightstand whatever you place in it will be quite inconspicuous.
It is best to sand lightly and then apply some Danish oil for a nicer finish at the end.
Finally simply attach each floating nightstand to the bed’s headboard using wood glue and screws.

Building the Bed Base
The bed base is made from plywood sheets.
It is best to go for relatively thick plywood for more sturdiness.
Carefully attach the plywood pieces together to form the base for the bed.
Make sure they are aligned well and apply the wood glue.
Then fasten together with screws.
All the pieces are now ready and all you have to do is to attach the bed frame with brackets and some support pieces for more sturdiness.
Attach the centre beam, as this is important for such a substantially big piece of furniture, and one which will need to withstand weight.
Then simply add support pieces horizontally all along, attaching to the bed’s frame and to the centre beam. Screw them from the inside too.
Finally you can mount the plywood sheet on top of everything.
Finishing Up
Last steps to finish this project!
Apply some Danish oil, and optionally, a layer of polyurethane to give a nice finish to your bed’s lumber.
Always give a quick sanding in between, and repeat the process a couple of times.
And you are all set to place a mattress on top and enjoy a good night’s sleep in your DIY platform bed!

Conclusion
This is not an easy project, especially considering that a bed is obviously so large.
You will need certain tools which are not that basic or cheap, but other than that if you follow the steps above you can manage to do this really amazing DIY project which will surely give you a great sense of achievement.
The fact that you can customise the bed as you like in terms of finishing, colour and design is just great!
And you can build it much more affordably than when you buy a readymade bed for sure!
See it Built!
This article is based on and inspired by the awesome platform bed designed and constructed by DIY Creators.
Check out the video on their YouTube channel here and see how this beautiful platform bed comes to life.

8 Top Design Ideas for Small Bedrooms
Author Chigwell Building & Joinery
Date 08/01/2020
If your bedroom’s size is rather small, you might be wondering how you will be able to cram all the furniture you need, and store your clothes and other belongings.
Small studio apartments and most modern properties tend to feature smallish bedrooms.
But in reality there is no need to give up hope as with some creativity and common sense you will be amazed at what you can make out of your small bedroom.
Here are 8 top tips which will definitely change your mind and solve your problems.
Read on to find out more, or use a jump link below to skip to a desired chapter:
Table of Contents
- Light Colour Scheme
- Install a Wall Bed
- Install a Fitted Wardrobe
- Integrated Shelves
- Store Items Up High
- Minimalist Styling
- Embrace Symmetry
- The Magic of Mirrors
- Conclusion
1. Light Colour Scheme

Keep it as light and as bright as possible.
The brighter the colour scheme you opt for, the bigger the room will appear.
So go for light colours such as white and beige.
If you are worrying that the light colour scheme might look plain, just add vivid or darker colours in the soft furnishings, such as the bedlinen and cushions, the carpet, and any key accessories like the bedside lamp.
2. Install a Wall Bed

The bed is the main and the biggest furniture piece in the room.
Naturally it is going to take up a good part of the room, especially since the room’s area is limited.
So if you have a small bedroom simply opt for a wall bed.
This will help to free up the valuable space in the room for other requirements during the day.
Nowadays there are several aesthetically pleasing but very practical wall beds, which will fold up against the wall easily, offering convenience as well as comfort.
3. Install a Fitted Wardrobe

Apart from the bed, the wardrobe will also take up a considerable amount of space.
So, when it comes to choosing the wardrobe for your small bedroom opt for a fitted wardrobe with sliding doors.
This will make sure that you make the best use out of the wall space available, while also avoiding wasting space in a restricted space whenever you need to open the wardrobe doors.
Also, make the best use out of the room’s height by going as far up as practically possible.
The height of the wardrobe will offer you more storage space for off season clothing and any other items you do not need to use often.
4. Integrated Shelves

Integrated shelves will give you greater convenience.
These types of shelves are versatile and ideal for small bedrooms as they will enable you to literally use up as much wall space as possible.
This will offer you so much more storage space!
5. Store Items Up High

As the floor space in a small bedroom is restricted you need to make the most out of the wall space.
So, make it a point to have as much storage space as possible up high.
This includes having a wardrobe which, if possible, goes all the way up to the ceiling, as well as installing floating shelves or units towards the upper part of the walls.
If your budget is not limited you could also opt for the more costly bespoke fittings.
6. Minimalist Styling

A minimalist theme is highly recommended for small bedrooms.
Simple designs or themes will make the room appear bigger.
So, apart from sticking to a light colour for the wallpaper or paint, make sure to go for light furniture.
The contrast in the colours should be attained from using bolder and darker colours in smaller amounts, such as in the bedside lamp, cushions and carpet.
When it comes to choosing a motif for the room, go for a delicate, pale one.
Good examples include flowers, leaves and simple shapes.
Bear in mind that soft, neutral colours will work wonders on small bedrooms.
7. Embrace Symmetry

Symmetry is an important principle when it comes to designing small bedrooms.
For improved visual balance, and more definition, it is recommended that you stick to a symmetrical concept when furnishing and decorating the room.
Sticking to symmetrical concepts will also help in offering an easy-on-the-eye scheme, as this goes hand in hand with minimalist designs.
It can also help to make your bedroom appear somewhat larger and more spacious.
8. The Magic of Mirrors

A mirror is a must-have in any bedroom.
However in a small bedroom you cannot devote a lot of space to a large wall mirror, as you should make better use of it for shelving, as discussed earlier.
Instead, you could opt for a full body length mirror that can lean up against the wall.
Alternatively if the wardrobe does not come with sliding doors, you could install a mirror on the inner side of one of the wardrobe doors.
On another note, if it is possible to have a mirror hung on one of the walls, make sure that you position it in a place where it can reflect the light that comes in from the window.
This will create the illusion that the room is bigger, apart from increasing natural light in the room.
Conclusion
There are all sorts of ideas that you could come up with when designing a small bedroom.
There is no need to worry about small rooms and their drawbacks, as in truth nowadays you will be able to find many innovative furnishings which will greatly maximise the space available.
From wardrobes with sliding doors, beds with storage space underneath, or wall beds, to floating shelves and desks, you will be amazed at the range of modern bedroom furnishings you will find in stores.
In some cases, you might worry about the costs involved to buy such furniture ready-made.
In that case, try to go for custom made or DIY furniture options, as at the end of the day it would most likely turn out to be considerably cheaper.
For instance, there is no need to spend a fortune to buy a ready-made floating desk.
You could make one yourself by simply installing a piece of plywood over shelf brackets!
Ultimately it is all a matter of creativity as affordable materials like plywood and MDF, and some simple tools could enable you to work wonders on furnishing your bedroom.
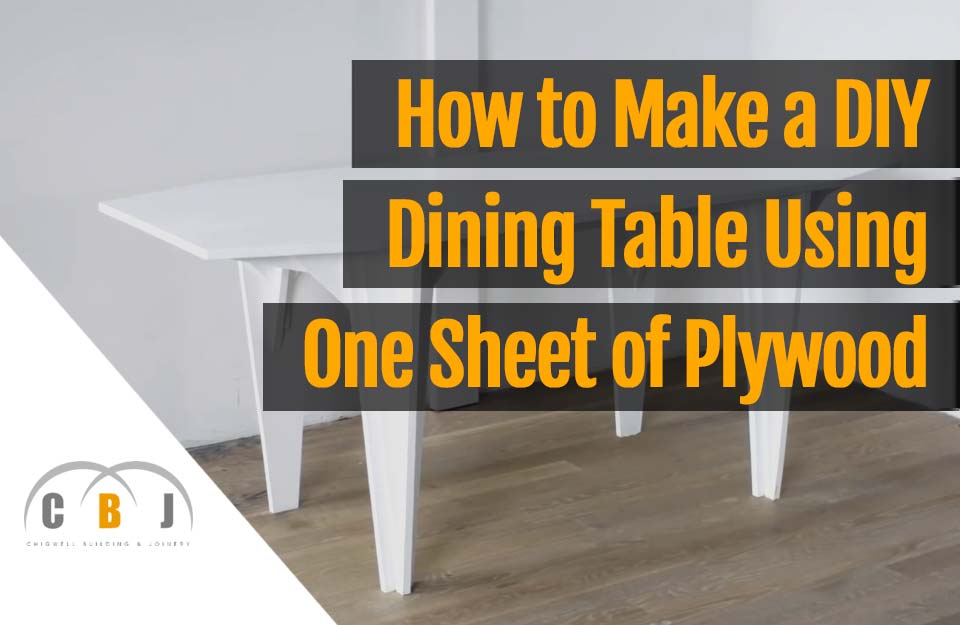
How to Make a DIY Dining Table Using One Sheet of Plywood
Author Chigwell Building & Joinery
Date 04/12/2019
A high quality and useable table is something that very home can benefit from.
Making a table yourself is really simple.
You might never have thought about it, but it is far cheaper and more fun than buying a readymade table, especially when considering that it will only amount to a little time, basic tools and materials to build yourself.
The following article outlines how to go about it.
Read on or hit a jump link below to skip to a desired chapter:
Chapters
- Tools & Materials Required
- Preparation
- Measuring, Marking & Cutting
- Making the Legs
- Cutting the Table Top
- Attaching the Legs
- Finishing & Painting
- Conclusion
- See It In Action
Tools & Materials Required
You will need the following supplies:
- sheet of plywood, with a recommended thickness of 19mm (¾ inch).
- water-based protective topcoat
- paint
- sandpaper
- screws
- wood putty
- glue
- ruler
- pencil
- cordless drill
- circular saw
Preparation
Gather the supplies and tools listed above.
Then use a space where there is enough room where you can work.
Remember that some cleaning up will inevitably be required since cutting wood is required.
Then decide on the preferred dimensions of your dining table and draw a plan with all the measurements marked.
Once the cutting is completed, it is recommended to seal the plywood with the water-based protective topcoat.
Measuring, Marking & Cutting

You will need to cut the plywood with the circular blade.
It is best to mark out the angles using a ruler and pencil.
In this way you will just need to follow these markings with the guide on the circular saw.
This will greatly reduce inaccurate cuts or any mistakes.
Once the cutting is completed, it is important to take the time to sand all the pieces.
This can be done with a 220 grit sandpaper.
Obviously if you use a fresh saw blade the cuts will be cleaner, however a light sanding is always recommended to ensure neater edges.
Making the Legs
The legs are an important part of the table.
Mark the areas where you intend to place the legs, as some will prefer not to place them right at the corners of the table top, but slightly inwards.
Make sure you measure well so that they are equally away from one another.
It is best to glue together four different sets of pieces, and to reinforce them with screws.
Clamp the pieces together.
Allow the glue to cure on the first set of pieces and then proceed to combine them together to form a leg.
Obviously this process will need to be repeated for all of the legs.
Cutting the Table Top

You will have decided on the size of the table before.
A DIY table can be as sturdy as a ready-made one.
You do not need to worry about the area of the table top as long as you use sufficiently thick plywood sheets and ensure that the assembling is carried out carefully.
Clamp down a straight edge and then start cutting strips off.
These will be put to good use as supports for the underside.
Assembling the inner support frame for the table is probably one of the most important steps.
To do this well it is best to use triangular pieces of plywood and glue them to the support strips you cut earlier.
Glue and screw these pieces to the inside corners of the table’s legs.
Then, also glue the pieces you had cut off from the top corners to one another so as to create a couple of triangular braces that will serve well as additional supports for the table’s frame.
Glue them together and screw them for additional sturdiness, and then screw to the inside of the frame.
At this point, since the pieces were triangular, you might happen to notice gaps.
In that case simply plug these gaps with scrap pieces that you will surely have gathered during the cutting of the inner frame.
Attaching the Legs

Once the base has been completed, you can then glue and screw the inner frame pieces, which will connect the legs together, to each of the legs.
At this point you will have the lower part of the table completed.
Finishing & Painting

The last step is to glue the tabletop to the base of the table.
At this point we can say that the table is ready to go.
All you need to do is to glue the table top to the base, and while doing so it is best to use weights so as to hold down the table top tightly to the base while you allow the glue to cure.
Any holes that were left by the screws should be filled up with some wood filler.
Allow it to dry, and then sand it until it is flush with the plywood.
This will ensure a neater result.
It is also best to take the time to smoothen off the edges with the sandpaper, as well as round over the edges a bit.
In case you opt to paint your table, then that is the final step.
Obviously prior to painting, make sure that the sanding is all completed, and that you wipe off all the parts with a moistened cloth so as to remove any dust residue that will have been left after the sanding.
It is best to give two coats of paint for a neater result.
Using a roller should give a smoother, streak-free finish.
And there you have it. Your DIY dining table is all done!
Conclusion
As you may have noticed you do not require any expensive tools and materials to build a dining table out of a single sheet of plywood.
Besides, as long as you follow the guide above, you will not need to worry about not being able to complete it successfully.
Anyone can manage to build a dining table as long as the steps above are followed carefully.
Always exercise caution when cutting the wood pieces, and try to be as precise as possible so as to avoid any mistakes that could mess up the final result.
Other than that you can have a nicely designed dining table at a fraction of the cost you would have had to pay for a ready-made one.
See It In Action
This DIY tutorial is based on the awesome instructional video by HomeMade-Modern.com
Go check out the video on their YouTube channel and see just how easy it is to make a beautiful dining table from a single sheet of ply!

