News
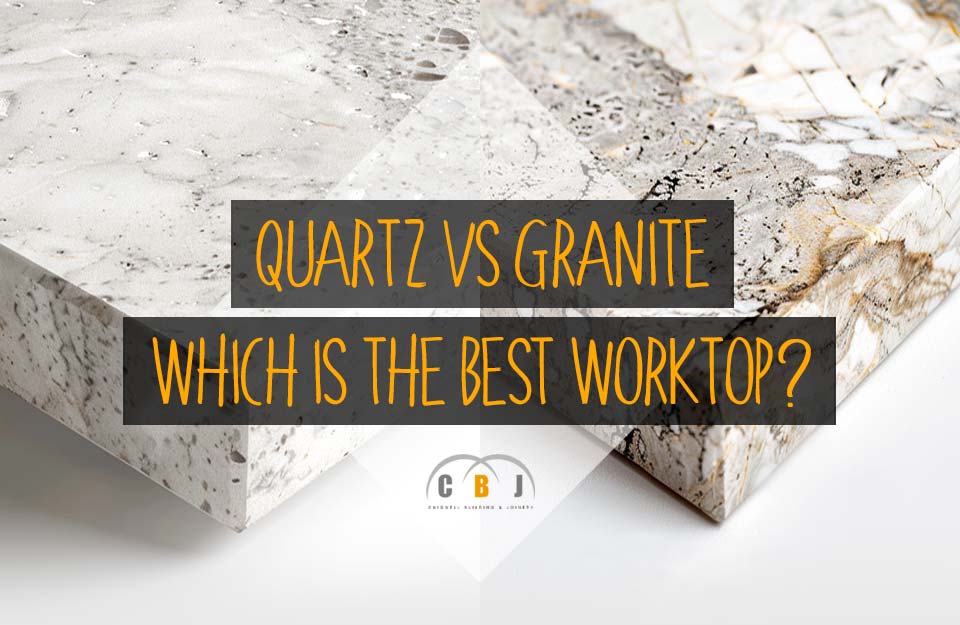
Quartz vs Granite - Which is the Best Worktop?
Author Chigwell Building & Joinery
Date 01/08/2024
Both quartz and granite are top options when it comes to kitchen worktops.
Many people in fact are unsure whether to choose one or the other.
First off, the differences between them are somewhat minimal.
Additionally, most people will not be that knowledgeable about why one might be better than the other in certain aspects.
In this guide we shall discuss both of these materials in more detail so as to allow you to make a better-informed decision.
Table of Contents
- Key Differences Between Quartz & Granite
- Origin
- Appearance
- Imperfections
- Durability
- Stain Resistance
- Mark & Scratch Resistance
- Maintenance & Care
- Heat Resistance
- Strength
- Longevity
- Water Resistance
- Design
- Installation
- Cost
- Conclusion
Key Differences Between Quartz & Granite
The primary difference between quartz and granite is that quartz is manmade whilst granite is a naturally occurring organic material.
Hence every piece of granite is unique and distinct from any other.
On the other hand, quartz is more artificial in its formation since it is formed from a mixture of naturally occurring quartz, polyester resin, and pigments.
Another difference is that quartz is slightly harder than granite.
Quartz has a rating of 7 on the Mohs hardness scale whereas granite has a rating of 6.
Quartz is available in practically any colour you desire and is also customisable since it is a manmade material.
Granite is also available in several colours and patterns but you cannot customise it as it is a natural material.
Origin

Granite is mined and it is a 100% natural pure stone.
It is quarried from the earth in large boulders and then gets divided into individual slabs and polished.
Granite occurs in a natural way; formed by the cooling of deep volcanic magma.
Hence each slab will be unique and distinct.
Quartz may look natural but in reality, it is not.
Quartz is crushed and then mixed with polymer resins which act as a binding agent along with colour pigments.
Following this mixture, quartz is extremely hard and strong.
The formulation is typically 93% quartz and 7% resin.
While there are countless patterns and colours to choose from unlike granite these are completely artificial not natural.
Appearance

Needless to say, both granite and quartz are very aesthetically pleasing.
They make the kitchen look more elegant and sophisticated.
They come in various colours and tones but as mentioned earlier granite has a natural pattern and colour whereas the pattern of quartz is manmade and customisable.
Granite is a natural beauty with various tones ranging from earthly ones to greener ones.
They blend beautifully with kitchen interiors.
Having said that, imperfections might be present in granite slabs since they are not manufactured artificially.
If you are looking for uniqueness then any imperfections will probably be insignificant for you.
On the other hand, quartz is a manufactured material and consequently, the designs are man-made albeit still appealing.
You will find more colours to choose from and quartz is generally a bit more glossy than granite.
It is important to bear in mind that quartz worktops should not be exposed to direct sunlight as they may start to discolour after prolonged exposure.
Imperfections

As previously mentioned since granite is a natural material it is bound to have certain imperfections.
However, such imperfections are welcomed as they offer a certain uniqueness to granite worktops.
Quartz on the other hand is more consistent and uniform.
Hence if you do not wish to have any kind of imperfections you should opt for quartz.
Durability
Both granite and quartz are very strong and extremely durable materials.
Granite is a very hard substance and scratches are not a problem.
It is also worth noting that granite will never depreciate in value and hence if you invest in such a worktop you can expect it to boost the value of the property.
Quartz is also extremely durable and one can say that it has the same thickness as granite.
It will not crack or chip.
However one may wish to note that despite this quartz worktops do not come with a lifetime guarantee.
If we were to say whether one of them is more durable than the other then quartz would be the answer as it is less prone to chipping than granite.
Stain Resistance
Granite is a porous stone.
However, stains are absolutely not a problem when it comes to granite worktops because granite will not absorb liquids as it will have been sealed.
Quartz is non-porous and hence it is virtually stain proof.
There are no capillary channels between the minerals.
Hence there is no risk that any spills will stain it.
Quartz is relatively better when it comes to stain resistance as granite will need sealing in order to be stain resistant as otherwise it would absorb any spills and stain.
Mark & Scratch Resistance
Both granite and quartz are very strong and durable.
You do not need to worry about marks and scratches ruining your countertops as both quartz and granite are highly scratch-resistant materials.
If you were to compare them to each other granite is more scratch and mark resistant than quartz.
Obviously, one will need to exercise caution as much as possible when cleaning and placing any utensils directly onto the worktops.
But chipping, scratching, and similar damages are not common with either granite or quartz.
Maintenance & Care

When it comes to cleaning and maintenance it is crucial to avoid using anything that is abrasive on granite and quartz.
Anything containing chemicals such as alkaline-based cleaning products or chlorine should be avoided as they might cause damage.
It is best to stick to warm soapy water when cleaning granite or quartz countertops.
Always opt for a PH neutral detergent and use a soft cloth.
It is also best to wipe it afterwards with a chamois leather cloth so as to dry it and remove any streaks.
Heat Resistance
Granite has very good heat resistance properties.
Thus it can handle high amounts of heat fairly well.
It can withstand being close to the cooker and even any hot pot that may have been placed on it for some time.
You will not have to worry that it will weaken or get damaged.
Quartz worktops are also relatively heat resistant.
However, you should avoid placing any hot pots or pans on a quartz worktop surface.
This could lead to what is referred to as a thermal shock and fracturing might result.
Having said that quartz can take temperatures over 250 degrees Celsius so you do not need to worry if it is installed against a hob.
Strength
There is no doubt that both granite and quartz are extremely strong and durable so whichever one you opt for there is no need to worry as they will offer you strength and longevity.
Having said that quartz is even stronger than granite relatively speaking. It is also heavier than granite.
Longevity
It is important to point out that while both granite and quartz are durable if we were to talk about longevity we would need to factor in other aspects.
For instance, as granite is a porous material sealing it well when it is installed is of the essence.
The sealing should also undergo a re-treatment every now and then as otherwise etching might occur.
This means that acids such as vinegar, tomato sauce, and lemonade spillages could mark the granite.
It is a good idea to splash some water on the countertop so as to see whether it gets absorbed or repelled.
If the granite looks dull instead of somewhat glossy then it means that it is time to reseal it.
Additionally, it is important to ensure that the worktops are cleaned properly and regularly.
Non-abrasive cleaning products should be used.
Quartz countertops will rank better than granite countertops when it comes to longevity.
This is mainly attributed to the fact that quartz is a non-porous material and consequently, it does not need sealing like granite.
It is also virtually maintenance-free.
Water Resistance
Both quartz and granite perform well when it comes to water resistance.
However, it is crucial to note that granite needs to be sealed well upon installation as otherwise, it is a porous material.
Moreover, resealing will be needed after a number of years.
Thus quartz, which is a non-porous material, outranks granite in terms of water resistance.
In this case, there is no need for sealing and hence this is one of the main advantages of quartz over granite.
Design
Quartz can be manufactured in various patterns, colours, and sizes.
So when it comes to choice and design flexibility quartz, one can say that quartz would outrank granite.
The latter comes in a more limited variety when it comes to dimensions and as noted earlier the patterns are natural.
Hence one would have to choose from patterns and colours that occurred naturally rather than stating exactly what he or she prefers.
Installation

Professional installation that ensures accuracy is a must for both quartz and granite.
Both materials will come at a rather high price, and being a long term investment that will add value to your kitchen and to your home in general, you want to make sure that they are properly installed.
In both cases the slabs will need to be cut precisely and so a very accurate template for each part of the worktop is of the essence.
The templates will also need to factor in any nooks and recesses.
You will also need to factor in the handling, transportation, proper positioning and stabilising.
A number of people will be required to take care of these processes which are all essential for proper installation.
Besides good teamwork and plenty of strength, it is crucial that a great deal of care and safety measures are used to prevent any damages to the granite or quartz.
Cost
One of the primary considerations when installing kitchen worktops is the cost.
Both granite and quartz are rather pricey.
Since this is a long term investment and you are getting high quality material, you can expect this.
Granite prices will vary depending on the quality you opt for.
Better quality granite will be more resistant to chipping and scratching than the cheapest granite that you will find on the market.
The availability or supply will also have an impact on the price as some granite types are more difficult to find, and consequently they will come at a higher price.
While quartz also comes at a hefty price, its price has gone down over the past few years and it will generally be relatively cheaper to opt for quartz instead of granite.
This will depend on the colour choice and availability too.
You will also need to take into account additional fabrication costs for both quartz and granite.
These include drainer grooves, upstands and inset sinks.
Conclusion
Both granite and quartz are considered to be top choices for kitchen worktops as they are enduringly durable and stylish.
The main drawback of granite is that it is porous and more sustainable to staining than quartz.
On the other hand, quartz can get damaged if exposed to excessively high temperatures.
Other than that one can safely say that they are both aesthetically pleasing, available in colours and patterns to suit any preference, and very durable.
We hope that this guide provided you with more insight about these two materials.
But ultimately, whether you choose one or the other, you can rest assured that both of them offer good value for money, very good longevity and peace of mind.

How to Cut a Quartz Worktop
Author Chigwell Building & Joinery
Date 01/06/2024
Quartz worktops have become a very popular choice for kitchens and counters.
They are hard wearing and durable, while also being aesthetically pleasing.
But can they be easily cut using regular every day power tools found at a hardware store?
Let’s find out.
Table of Contents
- Important Facts Before Cutting Quartz
- Tools & Materials
- Safety Precautions & Preparation
- How to Cut a Quartz Worktop
- How to Cut a Tap Hole in Quartz
- How to Cut Drain Grooves in Quartz
- FAQs
- What's the best tool to cut quartz?
- Can I cut quartz using a circular saw?
- Can I cut quartz using an angle grinder?
- Can I cut quartz by hand?
- Conclusion
Important Facts Before Cutting Quartz

Quartz is a manufactured compound, made up of natural quartz set in a resin with pigments.
In a very similar way to cutting a granite worktop, the material is very hard, thus the cutting process requires precision, the appropriate tools and experience.
As a result, cutting quartz is not that simple and specialist equipment is needed if you wish to do it yourself.
Should I Hire a Professional?
It makes more sense to hire a professional to do the job because you would need specialist equipment, sufficient space, and ideally have some experience how to go about it.
Quartz is not cheap, and you do not want it to crack or waste a significant part of the material because you did not cut it correctly.
A professional will be experienced at the job and be able to do it well, thanks to specialist tools.
Most professionals will also take care of installing the worktop onto any type of kitchen units for you.
Should I Cut Quartz Myself?
Being a solid material, it is not that straightforward to cut quartz.
Most people prefer to leave the task in the hands of a professional, who will have the necessary experience and equipment to do the job properly and safely.
Quartz is one of the hardest commercial materials.
A regular saw will simply not be up to the job.
You will need very strong power tools such as a circular saw with diamond tipped blades to cut through quartz.
While such power tools will be found at most hardware stores, you will need to factor in their cost, and the fact that they are ideally used by professionals as such tools need skill and expertise.
Consequently, considering that you would need to procure specialist equipment, ensure that there is sufficient space to do the job, and be very precise, since it is not an ideal DIY job.
Besides, there is also the risk of cracking.
So, all in all it is safer and more reasonable to have a professional see to such a task.
Tools & Materials
If you do decide to attempt to cut a quartz worktop yourself, you will need the following tools:
- Fixed circular saw - this will have round, serrated, revolving blades.
- Plunge circular saw or wet saw - this will have a pump which allows spraying water onto the cutting surface to reduce the chances of cracking.
- Diamond circular blades.
- Rotary stone cutter.
- Grinder diamond drum attachment - required for shaping and grinding.
Safety Precautions & Preparation

It’s important to point out that cutting quartz is not simple, and as power tools will need to be used, you need to bear in mind the dangers associated with this.
If you have never used power tools, it is not a good idea to start off by cutting quartz.
Circular saws are powerful and very loud.
They could harm your ears unless you wear suitable ear protection.
Moreover, the fine dust and powder that is released when cutting quartz could irritate your nose, eyes, mouth and skin.
Therefore it is essential to wear proper protective gear and breathing apparatus.
This includes overalls, goggles and a respirator.
You also need to choose a space which is big enough, while also taking into consideration that the quartz debris will easily move around.
So it is not such a great idea to do the cutting indoors as there is a lot of cleaning up involved too.
Also consider potential harm to children and pets should they breathe in the debris.
Cutting in a well ventilated, open space is recommended.
Using a wet saw can help to reduce the spread of dust.
Make sure to clean up immediately after the cutting is done.
The fine particles of quartz have jagged edges, and should they be inhaled they could cause serious damage to the lungs.
It is also important to ensure that you have a secure base which can hold the quartz safely while it is being cut.
Using heavy duty supports to secure the quartz slabs is important.
Needless to say, quartz is very heavy and it would cause serious injury should it fall on your feet.
It is also best to use spotters.
Check all the corners for placement and hold the pieces to prevent slipping.
Make sure to work slowly and very carefully.
You need to take your time and the drill speed needs to be slow and well controlled.
Avoid applying pressure, and let it cut steadily at its own pace.
Reduce speed as you get closer to the edge.
How to Cut a Quartz Worktop

To cut quartz you will need to be familiar with two basic cuts, namely the straight and the curved cuts.
When combined, you can achieve a seamless and smooth result.
Straight Cuts
Most countertops will be rectangular with straight edges, and in these cases you will only need to make straight cuts.
You may need to use a stationary circular saw or a manual plunge saw, depending on the size of the quartz slab.
- Mark and measure where you will be cutting.
- Make sure to stabilise the slab.
- Attach a diamond saw blade and set it to cut at the required depth.
- Start a few inches from the edge, plunge the circular saw in the cutline, and start to push firmly along.
- Cut through the end, allowing the saw to stop entirely prior to lifting the blade.
- Polish off the rough-cut edge.
Curved Cuts
Curved cuts are obviously trickier and more demanding.
You would generally need to do such cuts to accommodate appliances and the sink. Here is how to go about it:
- Use a template so as to mark where you need to cut.
- Stabilise the quartz slab, making sure you double check the placement with a level.
- Tape along the line of the curve.
- Attach a diamond blade to the wet saw, setting it to cut at the right length.
- Start at the edge of the slab, making a straight cut half an inch from the curve, till a piece is removed.
- Continue to make straight cuts until all the excess material has been removed.
- Grind off the sharp edges created by the cuts.
- Then, grind down the edge as close to the tape as you possibly can.
- Polish the rough edge.
How to Cut a Tap Hole in Quartz
In order to cut a hole it is best to make use of a template where you will be drilling.
You will also need to use a drill that is ideal for masonry and hard material like quartz.
Hold the template in place, put the drill bit in the hole and start drilling.
Make sure to work your way slowly, without applying pressure to the drill.
It is recommended to use water to keep the drill bits cool and lubricated.
When you are around ¼ inch deep, stop drilling and remove the template.
Continue the drilling process, adding water as needed.
As you start to get close to the end of the hole, reduce the speed slowly.
You should only let the drill make just enough contact to cut the hole at this point.
This is important to reduce the possibility of cracking and chipping.
How to Cut Drain Grooves in Quartz
Drainer grooves are often used on countertops.
They are designed to collect water that gets splashed onto the sides.
This helps to protect the material from damage.
These grooves are cut into the quartz and to do this you would need to use a diamond drainer groove flute wheel.
These can be either sintered or electroplated or resin, and they come in different sizes to achieve the desired widths.
FAQs
What's the best tool to cut quartz?
Cutting and rotary tools are a must to cut quartz precisely. Such power tools are best handled by someone who has experience. Commonly used tools for cutting quartz include a wet saw, a plunge circular saw, or a fixed circular saw. Grinder wheels or rotary stone cutters are also used.
Can I cut quartz using a circular saw?
Yes, a circular saw is one of the best tools that you can use for cutting quartz. A wet cutting circular saw is better than a dry circular saw as it helps to reduce the dust generated.
Can I cut quartz using an angle grinder?
This is not recommended, as a circular saw is more ideal to cut quartz. While you may still manage to cut it with an angle grinder you will need more time and patience, and be prepared to deal with a lot more dust and debris.
Can I cut quartz by hand?
Cutting quartz is no easy task, and you will need specialist power tools to do the job.
Conclusion
Cutting quartz is not straightforward at all, and while it can be done if you have some experience and the right tools, it may still be better to hire a professional to do the job.
Small mistakes can be quite costly, and there are also safety considerations to take into account.

How to Cut a Granite Worktop
Author Chigwell Building & Joinery
Date 02/04/2024
Granite is a very popular countertop surface for modern kitchens.
However, if you’re planning on a DIY project that involves cutting granite yourself, it’s important to understand how to best go about it.
Granite is an extremely hard organic material that requires the right tools, skills and experience to cut correctly.
Table of Contents
- Important Facts Before Cutting Granite
- Tools & Materials
- Preparation
- How to Cut a Granite Worktop
- How to Cut Granite in Situ
- How to Cut a Tap Hole in Granite
- How to Cut a Kitchen Sink Hole in Granite
- How to Cut Drain Grooves in Granite
- FAQs
- What's the best tool to cut granite?
- Can I cut granite using a circular saw?
- Can I cut granite using an angle grinder?
- Can I cut granite by hand?
- Conclusion
Important Facts Before Cutting Granite
Should I Hire a Professional?
Cutting a granite worktop yourself is not that simple, even if you have tools for the job.
First of all, granite is a very heavy material, and as a result you will need the assistance of other people in order to handle it.
Moreover, since granite is brittle, it’s prone to breaking if mishandled.
It’s also easy to damage while cutting, and needless to say, since it is an expensive material this is something to consider.
Considering all this, plus the fact that you will need specialist tools, it’s often more practical to leave the job in the hands of a professional.
If you do not have specialist tools you will need to either borrow them or buy them, so it will end up being uneconomical.
Additionally, granite worktops need to be cut very accurately.
Even the slightest millimetre discrepancy could end up making a difference when installing it, because then the cabinets, sink etc may not fit flush or correctly.
Should I Cut the Granite Myself?
Cutting granite properly is not that straightforward.
You will need great precision, and most importantly, the right tools for the job.
You will also need to have a clear layout of the kitchen worktops, including templates.
While it is possible to do the job yourself, many people opt to hire a professional for the job to ensure that it’s done properly.
Tools & Materials

The following tools and materials are required to cut granite countertops:
- Dust mask
- Safety goggles
- Ear plugs
- Tape measure
- Marker pen
- Painter’s tape
- Clamp
- Circular saw
- Angle grinder
- Spray bottle
- Damp cloth
Preparation
You will need to prepare a stable work surface where the cutting will take place, with the granite clamped down so that it does not move.
Worktop templates are a must, so measure and mark lines to guide the cutting in advance.
The lines should be covered with some painter’s tape to protect the granite from possible chipping.
Once you’ve done this, remark the lines on the tape.
Finally, make sure to wear a dust mask and safety goggles before you start the cutting process.
How to Cut a Granite Worktop

Firstly, set up a straightedge guide along the first line that you intend to cut.
While cutting, it’s recommended that you back-cut the granite first by cutting a section of around 2 inches at the finishing end of the line.
You will need to cut slowly and precisely along the cut line, either using a circular saw or an angle grinder.
Make sure that you always move the tool as you proceed along the cut line, but avoid forcing it along.
If you feel that the tool is struggling, it’s best to cut in two passes.
Once you have completed the cutting, let the dust settle and remove the tape. Then, wipe the granite edges with a damp cloth.
You may notice uneven or rough edges which can then be smoothed down with an angle grinder.
It’s recommended to regularly spray the top of the granite with water so as to help minimise the dust produced and cool the blade.
It is also a good idea to stop at regular intervals to apply cutting oil to the drill.
How to Cut Granite in Situ
Cutting granite in situ can be quite complicated.
The complexity of the job will depend on the size and the layout of the granite, as well as on any in-built elements such as sinks.
In such a case it is often more practical to hire a professional for the job.
How to Cut a Tap Hole in Granite

Start by preparing the granite by marking the cut lines. Like the example above, cover the lines with tape.
Then before you begin cutting, put on appropriate protective equipment.
Start by slowly cutting along the lines using a circular saw.
Cutting holes is more challenging as you will need to change the direction of the cutting.
In the case of holes, you will need to drill a hole in each corner of the hole you want to cut.
You will need to start with plunge cuts in order to enter the granite surface with the saw or grinder. For round holes you will need to use a diamond-tipped hole saw.
Press down as gently as you can on the hole drill, pull the trigger, and try to keep firm pressure on the drill.
If you do not push you should get a better result as you will be able to cut more cleanly.
Always use both hands when operating the saw to have maximum control over it as well as prevent any kickbacks or slipping.
It’s important to ensure that any hole that you make is at least an inch away from the edge as otherwise there is a good chance that the granite will break.
How to Cut a Kitchen Sink Hole in Granite
Housing a sink will require you to cut the granite accordingly.
The process is similar to that required to cut any hole in granite, but in this case it is highly recommended that you have a clear template to match the exact dimensions of the sink that will be installed.
Start by drilling a hole in each of the corners of the sink’s outline.
Then make a plunge cut to enter the granite and commence cutting.
How to Cut Drain Grooves in Granite
To cut drain grooves in granite you will need to use a flute wheel.
This will allow you to grind the grooves as well as polish them and get a smoother finish.
This is a highly skilled and challenging task, so unless you know what you’re doing, hire a professional for this job.
FAQs
What's the best tool to cut granite?
A standard circular saw or a wet-cut circular saw are the best tools for cutting granite. The latter is better as it produces less dust.
Can I cut granite using a circular saw?
Yes, in fact a circular saw is the most suitable tool you can use for granite cutting. Granite can be cut either wet or dry. So, depending on what you prefer you can use a standard circular saw or a wet-cutting saw.
Can I cut granite using an angle grinder?
Yes you can, and in fact an angle grinder is more ideal if you need to make smaller cuts.The following is an overview of how to proceed:
- First of all make sure that you have the right cutting blade for the angle grinder. The best is a diamond blade.
- Secure the granite to a stable surface and put on protective equipment.
- Mark the cutting lines, and place painter’s tape along the lines.
- Start by making small and shallow cuts. Then, work your way slowly cutting along the marked lines. Never attempt to cut the whole piece in one go.
- Cool the blade regularly with a wet sponge, and clean the granite with a damp cloth.
Can I cut granite by hand?
Granite can be cut by hand. However, since it is very brittle, hand cutting is not recommended. You should also consider the financial aspect, because you would not want to damage the granite and have to find a replacement. Any mistakes can be very costly.
If however you feel experienced enough to do so, the following is how to best go about it:
- Clamp the granite to a stable surface.
- Mark the cut lines, adding an extra ¼ inch to account for the width of the chisel and blade.
- Hold the chisel’s point to rest against the granite and gently start to tap the head with a mallet.
- Chisel a groove of around ½ inch in depth along the cut lines. Make sure they are perfectly aligned.
- Then, using a diamond-tipped hand saw start to cut, wetting the blade regularly to minimise the dust.
Conclusion
While considering everything, it’s generally recommended to hire a professional to cut granite.
With it being such a fragile and expensive material, any mistake could be a costly one.
If however you are skilled and experienced enough for the job, and have the right tools at your disposal, cutting granite yourself is possible.
But as mentioned above, it carries huge risks.
As long as you take the right precautions and have the right tools, you can carry out granite cutting as a DIY job if you wish.
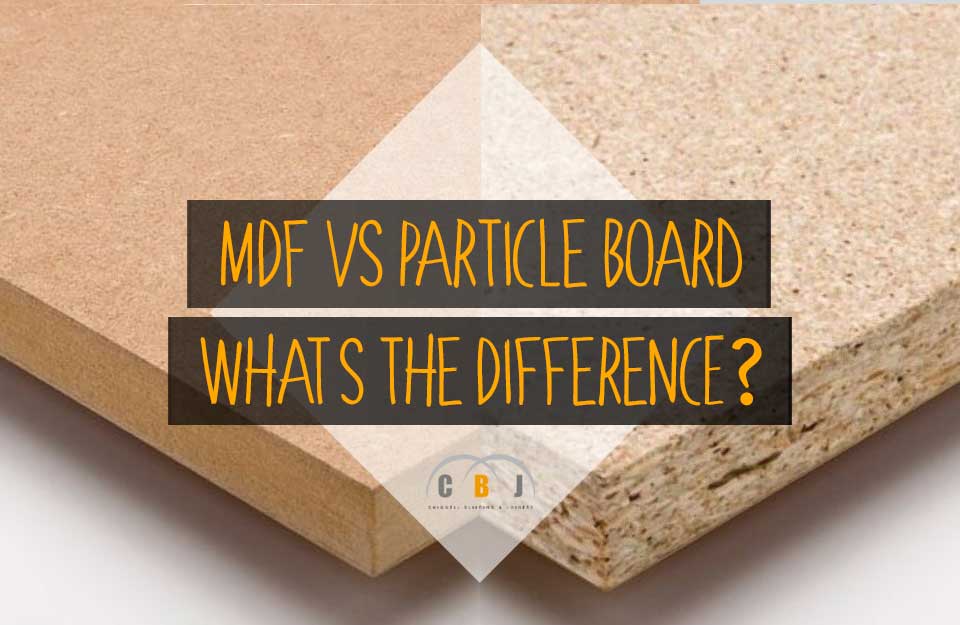
MDF vs Particle Board - What's the Difference
Author Chigwell Building & Joinery
Date 01/02/2024
When buying building materials or even purchasing new furniture, you need to consider the quality of the material you choose.
MDF and particle board are among the most popular materials used for various kinds of building projects as well as furniture, since they help to keep prices down.
However, it’s important to be aware of some key differences between the two in order to choose wisely.
Both materials have a similar look but don't quite match up in practical terms.
In the chapters below, we take a look at the key difference between MDF vs particle board, highlighting their pros and cons.
Table of Contents
- What is MDF?
- What is Particle Board?
- Key Differences Between MDF vs Particle Board
- Which is Stronger - MDF vs Particle Board?
- Conclusion
What is MDF?

Image credit: Amazon
MDF stands for Medium Density Fibreboard.
Despite being a by-product of waste wood material, it’s considerably strong and dense.
This is because it is mainly made from wood fibres as opposed to sawdust.
MDF Pros
- Good quality material
- Strong and dense
- Can be painted
- Easy to drill and cut
- Holds screws and nails well
- Smooth surface
- Has a realistic finish
- Does not deteriorate like particle board if exposed to moisture
MDF Cons
- Heavy compared to particle board
- Can release toxic formaldehyde when cut
- More expensive than particle board
- Absorbs water quickly, leading to swelling and damage
What is Particle Board?

Image credit: Wikipedia
Particle board is also known as chipboard or low-density fibreboard.
Like MDF, it is essentially another waste-wood product.
This is because it is made up of byproducts derived from woodwork.
The sawdust gets compressed with resin adhesives to produce sheets of workable material.
Particle boards are used for low-end furniture and home decor projects.
It’s often used for the underlying layer of countertops.
Often laminate or veneer are used to finish the surface of particle boards in order to give it a better look.
Particle Board Pros
- Inexpensive
- Easy to work with
- Holds screws well
- Can be drilled into easily
- Can be cut, painted and glued easily
- Has a smooth and flat surface
- Lightweight and easy to carry or transport
- Ideal for lower end projects
- Easy to clean and maintain
- Made from waste-wood products so eco-friendly
- Good soundproofing properties
Particle Board Cons
- Easily snaps or cracks if bent
- Low durability
- Uneven rough surface
- Not very durable
- Low moisture resistance, leading to expansion problems
Key Differences Between MDF vs Particle Board
One of the main differences between MDF and particle board is that a different amount of material is used to produce them.
MDF is relatively more expensive as it’s stronger and denser than particle board.
This is mainly attributed to the fact that it is made from wood fibres rather than sawdust, as in the case of particle board.
In fact, while particle board has an acceptable level of strength, it’s nowhere near as strong as MDF.
Moreover, it will not stand up to humidity and high levels of moisture as well as MDF.
Despite the fact that they look very similar, MDF does not have any wood grain.
This is due to the fact that it is formed under high pressure and at extreme temperatures, resulting in no voids at all in its composition.
Which is Stronger - MDF vs Particle Board?
There is no denying that MDF is stronger than particle board.
In fact, many like to describe it as being a type of particle board which has been improved.
MDF is an engineered wood that is manufactured using wood fibres which are then bonded together with resin and other adhesives by means of very high compression and temperatures.
On the other hand, particle boards are made similarly but using sawdust.
Hence, MDF is considerably denser and stronger than particle board.
MDF is still not ideal for scenarios with high moisture or humidity, but if sealed at the edges, it will withstand such conditions more than particle board for a certain period of time.
Conclusion
By now you should be in a better position to appreciate the differences between MDF and particle board.
As explained in more detail above, both of them have their respective pros and cons.
Hence, when choosing you will need to take into account their durability, functionality, aesthetic appeal, weight and budget.
This will help you to make a well informed choice depending on your project requirements.
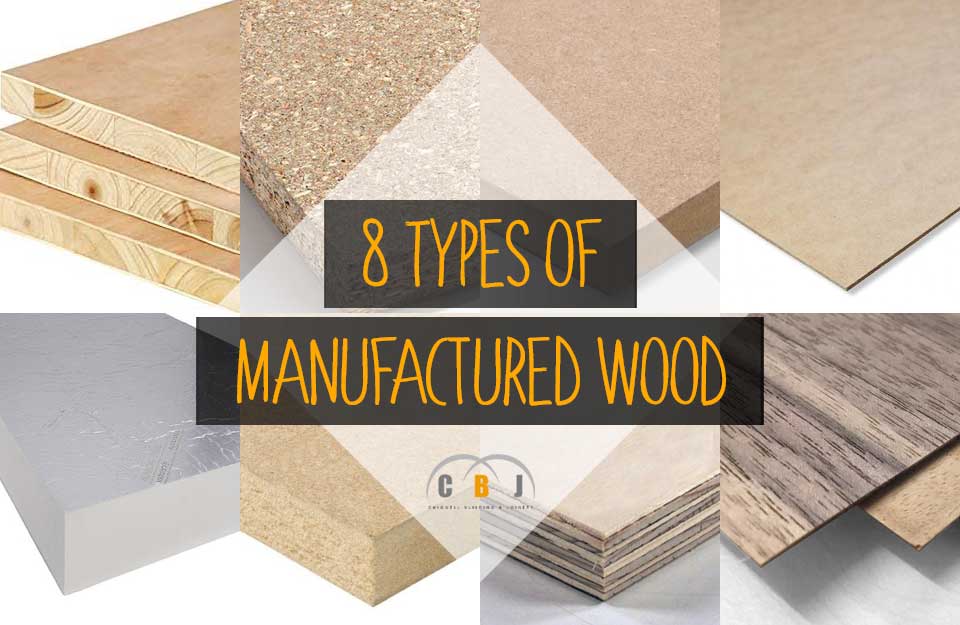
8 Types of Manufactured Wood
Author Chigwell Building & Joinery
Date 01/12/2023
Wood has been a foundational material for centuries, shaping our homes, furniture, and countless other items.
But there's more to wood than what grows in forests.
Manufactured wood, also known as engineered wood, brings forth a world of possibilities.
In this article, we'll explore eight common types of manufactured wood, delving into their uses, advantages and drawbacks.
Table of Contents
- What is Manufactured Wood?
- 1. Blockboard
- 2. Chipboard (Particleboard)
- 3. Fibreboard
- 4. Hardboard
- 5. Insulation Board
- 6. MDF
- 7. Plywood
- 8. Veneer
- Conclusion
What is Manufactured Wood?
Manufactured wood stands as a testament to human ingenuity in the realm of woodworking.
Unlike traditional lumber, which is sourced directly from trees, manufactured wood is an amalgamation of wood fibres, particles, or even entire logs that have undergone meticulous engineering processes.
The production of manufactured wood involves breaking down raw wood materials into smaller components, often in the form of fibres, chips, or sawmill shavings.
These components are then combined using high-quality adhesives, creating a strong bond that is further reinforced through heat and pressure.
This process, often termed as composite technology, results in the formation of sturdy and versatile wood products.
One of the defining features of manufactured wood lies in its consistency.
Unlike natural wood, which can vary significantly in terms of density, texture, and appearance, engineered wood products offer uniformity.
This consistency allows manufacturers and builders to predict and control the material's properties, ensuring that it meets specific standards and requirements.
Moreover, the adaptability of manufactured wood is noteworthy.
By altering the composition, density, and adhesives used in the manufacturing process, engineers and designers can tailor these materials for a wide array of purposes.
This adaptability has led to the creation of diverse engineered wood products, each optimised for particular applications in the construction, furniture, and interior design industries.
Manufactured wood is not merely a replication of natural wood; it represents an enhancement, an evolution that addresses the limitations of traditional lumber.
While solid wood can be susceptible to warping, cracking, and insect infestations, engineered wood products are engineered to resist these issues.
Additionally, due to their consistent quality and availability, they are often more cost-effective, making them an attractive choice for both large-scale construction projects and intricate furniture designs.
1. Blockboard

Image credit: Gharpedia
Blockboard, a versatile type of manufactured wood, is known for its remarkable strength and stability.
The manufacturing process of blockboard begins with selecting high-quality softwood strips.
These strips are carefully arranged side by side and bonded together using strong adhesive.
Once the core is formed, it is enveloped by thin layers of hardwood veneers.
These veneers are glued onto both sides of the core, creating a sandwich-like structure.
The entire assembly is subjected to high pressure and heat, ensuring a secure bond and structural integrity.
Uses of Blockboard
Blockboard finds widespread use in the construction industry, particularly in creating heavy-duty furniture, doors, and panels.
Its robust nature makes it ideal for applications where strength and stability are paramount.
Furniture crafted from blockboard includes cabinets, tables, wardrobes, and shelving units.
It is also frequently employed in interior and exterior doors due to its resistance to warping.
In addition, blockboard is used in wall panels and partitions, where durability and longevity are essential.
Advantages of Blockboard
Exceptional Strength
The core made of softwood strips and hardwood veneers gives blockboard exceptional strength, making it suitable for heavy-duty applications.
Stability
Blockboard is highly stable and resistant to warping, ensuring that furniture and doors retain their shape and functionality over time.
Versatility
Its versatile nature allows for various finishes, making it adaptable to different interior and exterior design styles.
Ease of Workability
Blockboard is relatively easy to cut, shape, and finish, making it convenient for carpenters and craftsmen to work with.
Drawbacks of Blockboard
Weight
Due to its dense structure, blockboard can be heavy, which might pose challenges during installation, especially for larger furniture pieces.
Moisture Sensitivity
While blockboard is more stable than solid wood, it can still be affected by moisture.
Prolonged exposure to damp conditions can lead to damage, making proper sealing and finishing crucial.
2. Chipboard (Particleboard)

Image credit: Wikipedia
Chipboard, often referred to as particleboard, is engineered from a blend of wood chips, sawmill shavings, and resin binders.
These raw materials are mixed thoroughly and then compressed under high pressure and heat.
The heat activates the resin, creating a strong bond that holds the wood particles together.
This process results in a dense and robust sheet material, ready for various applications.
Uses of Chipboard
Particleboard is a versatile material extensively used in furniture manufacturing.
It serves as the core material for cabinets, shelves, tables, and various other pieces.
Its smooth surface and ability to hold finishes well make it suitable for laminating or veneering, enabling a wide range of decorative options.
Additionally, particleboard is employed in interior construction for applications such as wall panels and partitions.
Advantages of Chipboard
Affordability
Particleboard is considerably more budget-friendly than solid wood, making it an economical choice for furniture and interior construction.
Versatility
Its smooth surface allows for easy finishing, enabling a variety of decorative treatments such as painting, veneering, or laminating.
Environmentally Friendly
Particleboard is often made from recycled wood materials, contributing to sustainable practices in the woodworking industry.
Consistency
The manufacturing process ensures uniformity, providing consistent quality and thickness across sheets.
Drawbacks of Chipboard
Moisture Sensitivity
Particleboard is highly susceptible to moisture.
Prolonged exposure can cause swelling and warping, limiting its use in damp environments.
Strength
While sturdy, particleboard is not as strong as solid wood, making it less suitable for applications requiring significant weight-bearing capacities.
Durability
Over time, especially with heavy use, particleboard may chip or dent more easily than solid wood, impacting its long-term durability.
3. Fibreboard

Image credit: Wikipedia
Fibreboard is crafted from wood fibres, usually sourced from recycled wood products or wood chips.
These fibres are mixed with heat and adhesive, then subjected to high pressure, forming a dense and uniform sheet material.
The heat activates the adhesive, bonding the fibres tightly together.
The density of the board can be varied based on the application requirements, resulting in different types such as high-density fibreboard (HDF) and low-density fibreboard (LDF).
Uses of Fibreboard
Fibreboard finds extensive use in the furniture industry, where its malleability allows intricate designs for items like cabinets, tables, and chairs.
High-density fibreboard (HDF) acts as a sturdy foundation in laminate flooring, offering durability and a smooth surface.
Additionally, it serves as the core material for interior doors and decorative wall panels, effectively holding veneers and laminates.
In crafting and DIY projects, low-density fibreboard (LDF) is preferred due to its lightweight nature and ease of intricate shaping.
Advantages of Fibreboard
Versatility
Fibreboard's ability to hold finishes well makes it a preferred choice for applications where a smooth, even surface is necessary.
Economical
Compared to solid wood, fibreboard is cost-effective, making it a budget-friendly option for furniture and interior elements.
Eco-Friendly
Often made from recycled wood fibres, fibreboard promotes sustainable practices in woodworking.
Ease of Machining
Fibreboard can be easily cut, shaped, and moulded, allowing for intricate designs and creative detailing in furniture and decorative pieces.
Drawbacks of Fibreboard
Moisture Sensitivity
Similar to other engineered wood products, fibreboard is sensitive to moisture. Prolonged exposure can cause swelling and damage the material.
Durability
While suitable for many applications, fibreboard is not as durable as solid wood, especially in high-stress areas.
Limited Load-Bearing Capacity
Due to its composition, fibreboard is not ideal for applications that require substantial weight-bearing capabilities.
4. Hardboard

Image credit: Wikipedia
Hardboard, also known as Masonite, is a versatile engineered wood product created by refining wood fibres into a pulp.
This pulp is then combined with adhesives and compressed under high pressure.
Heat is applied during the pressing process, creating a solid, dense board.
This results in a dense and exceptionally smooth board.
Its robust nature makes it a popular choice in various applications.
Uses of Hardboard
Due to its smooth surface and high strength, hardboard is employed in a range of applications.
It is often used as backing material for cabinets, providing stability and support.
In the construction industry, hardboard finds use as door skins, where its resilience and ease of machining make it a preferred material.
Additionally, it is utilised in decorative wall panelling, adding a sleek finish to interior spaces.
Advantages of Hardboard
Smooth Surface for Finishing
One of hardboard's notable benefits lies in its smooth texture, providing an excellent canvas for painting or veneering applications.
High Density and Strength
Its dense composition imparts significant strength, making hardboard resistant to warping and damage, ensuring durability in various uses.
Lightweight and Easy Handling
Despite its robustness, hardboard is relatively lightweight, making it easy to handle and install, enhancing convenience in construction projects.
Versatility in Machining
Craftsmen and builders favour hardboard due to its versatility in machining, allowing for intricate designs and precise shaping.
Drawbacks of Hardboard
Moisture Susceptibility
One of hardboard's limitations is its vulnerability to moisture.
Prolonged exposure to water can cause it to swell or deteriorate, limiting its application in damp environments.
Lack of Natural Grain Patterns
Unlike solid wood, hardboard lacks the inherent grain patterns.
This absence might be a drawback in applications where the desire is for the natural aesthetic of wood, impacting its use in certain decorative contexts.
5. Insulation Board

Image credit: Ebay
Insulation boards are crafted through compressing wood fibres, creating a dense structure optimised for thermal efficiency.
These fibres, often derived from recycled wood products, are bonded under pressure, forming sturdy panels.
Uses of Insulation Board
Insulation boards are widely used in buildings to enhance energy efficiency.
They serve as a barrier against heat transfer, keeping spaces warm in winter and cool in summer.
Advantages of Insulation Board
Excellent Thermal Insulation
Insulation boards excel in providing thermal insulation, regulating indoor temperatures and reducing energy consumption by minimising heat loss or gain.
Lightweight and Easy Installation
Their lightweight nature makes them convenient to handle and install, speeding up construction processes and lowering labour costs.
Eco-Friendly Option
Many insulation boards are made from recycled wood fibres, making them environmentally friendly choices in construction, aligning with sustainable building practices.
Drawbacks of Insulation Board
Moisture Sensitivity
Insulation boards can be sensitive to moisture.
Prolonged exposure to damp conditions might compromise their insulating properties and structural integrity.
Limited Load-Bearing Capacity
While suitable for insulation and soundproofing, insulation boards typically have limited load-bearing capacity, restricting their use in certain structural applications.
Proper support and framing are crucial when incorporating them into construction projects.
6. MDF

Image credit: Amazon
MDF or Medium Density Fibreboard is a versatile manufactured wood product.
MDF is created by breaking down wood fibres into a pulp, which is then mixed with wax and resin adhesive.
This mixture is compressed and heated to form sturdy sheets of uniform density.
Uses of MDF
MDF's smooth and uniform surface makes it a preferred choice for crafting furniture pieces like tables, chairs, and cabinets.
Its consistent texture allows for intricate designs and detailed woodworking.
In addition, MDF is often used for decorative mouldings and trim work due to its ease of shaping and finishing.
It can mimic the look of solid wood at a fraction of the cost.
MDF also serves as a core material for doors, especially those with intricate designs.
It provides stability and durability, making it suitable for interior and decorative doors.
Advantages of MDF
Uniform Texture
MDF has a consistent texture, ensuring smooth finishes on all sides.
MDF easily accepts many forms of primer for a smoother paint finish.
This uniformity is valuable in applications where a polished appearance is essential.
Versatility
MDF readily absorbs paints, and adheres to veneers and laminates, allowing for a variety of finishes.
This adaptability makes it ideal for creating custom designs in furniture and decorative elements.
Cost-Effectiveness
Compared to solid wood, MDF is a more affordable option for furniture and decorative applications, making it accessible for various budgets.
Drawbacks of MDF
Moisture Vulnerability
MDF is sensitive to moisture.
Prolonged exposure to damp conditions can cause it to swell or lose structural integrity.
Proper sealing and finishing are essential to protect it from moisture.
Limited Structural Strength
While MDF is excellent for decorative and lightweight applications, it lacks the structural strength of solid wood.
It may not be suitable for heavy-load-bearing furniture or structural components without proper reinforcement.
7. Plywood

Image credit: Wikipedia
Plywood is perhaps one of the most well-known engineered woods.
Plywood is manufactured by bonding multiple layers of thin wood veneers, known as plies, together.
Each ply is positioned with its wood grain perpendicular to the adjacent layers.
This cross-graining technique enhances the structural integrity of the material.
The layers are bonded with adhesive under high pressure and heat, creating a robust and durable sheet.
Uses of Plywood
Plywood is a staple in the construction industry.
It is widely used for sheathing, roofing, flooring, and formwork due to its strength and resistance to warping.
Plywood's stability makes it valuable in structural applications.
Plywood also serves as a foundational material for furniture, especially in modern and contemporary designs.
Its versatility allows for intricate cuts and designs, making it ideal for crafting chairs, tables, cabinets, and shelving units.
Plywood is also a popular choice for constructing cabinet boxes.
Its stability ensures that cabinets retain their shape over time, even under the weight of kitchen appliances and utensils.
Advantages of Plywood
Strength and Stability
Plywood's cross-grain construction gives it remarkable strength.
It can withstand heavy loads and resist bending and warping, making it a reliable choice for various applications.
Versatility
Plywood comes in different grades and thicknesses, making it adaptable for diverse projects. It can be easily cut, shaped, and finished to suit specific requirements.
Cost-Effectiveness
Plywood offers a balance between cost and performance. It provides significant strength without the high price tag associated with solid wood.
Drawbacks of Plywood
Vulnerability to Moisture
While exterior-grade plywood is designed to resist moisture, it is not entirely waterproof.
Prolonged exposure to water can lead to delamination and deterioration of the material.
Aesthetics
The visible layered structure of plywood might not suit all aesthetic preferences.
In high-end furniture and architectural applications, solid wood veneers are often preferred for a seamless, natural appearance.
8. Veneer

Image credit: Amazon
Veneer is not a wood type per se, but rather a thin layer of wood sliced or peeled from a log.
Veneer is created by slicing or peeling thin layers from logs or using advanced cutting techniques.
These layers, often just a few millimetres thick, showcase the wood's natural grain patterns and colours.
The veneers are then processed to enhance their durability, flexibility, and appearance.
They can be stained, dyed, or even engineered to achieve specific finishes and colours.
Uses of Veneer
Veneer is widely used in furniture manufacturing.
It provides an opportunity to showcase expensive or exotic wood species without the high cost of solid wood.
Veneered furniture pieces often have a polished and refined appearance.
Many high-quality kitchen cabinet doors are crafted with veneered surfaces.
This application allows for uniformity in appearance and texture across multiple cabinet doors and panels.
Veneer is also often applied to decorative panels, enhancing their visual appeal.
These panels find use in interior decor, wall coverings, and even upscale flooring.
Advantages of Veneer
Cost-Effectiveness
Veneer allows the use of premium wood species without the expense of solid wood.
This cost-effective alternative makes it possible to achieve an elegant look within budget constraints.
Variety
Veneers come in a wide array of wood species, allowing for diverse aesthetic choices.
From the warmth of cherry wood to the elegance of walnut, veneer provides options for various interior design styles.
Flexibility
Veneer can be applied to different surfaces, including curved ones, thanks to its flexibility.
This makes it versatile for a range of applications in furniture and interior design.
Drawbacks of Veneer
Durability
While veneer is durable, it is not as resilient as solid wood.
It can be susceptible to scratches and damage, although high-quality finishes mitigate these risks to a large extent.
Moisture Sensitivity
Veneer, especially natural veneer, can be sensitive to changes in humidity.
Extreme fluctuations can lead to warping or delamination, making it important to maintain stable indoor conditions.
Repair Challenges
Repairing damaged veneer can be challenging.
Unlike solid wood, which can be sanded and refinished multiple times, veneer has limited depth, making it harder to repair deep scratches or dents without replacing the entire veneer sheet.
Conclusion
Manufactured wood opens doors to creativity and sustainability in the world of woodworking.
Each type, from the robust blockboard to the versatile plywood and the insulating wonders of insulation board, brings its unique set of qualities to the table.
Understanding these engineered wood varieties not only broadens our options but also fosters a more eco-friendly approach to woodworking, utilising resources efficiently and reducing waste.
As technology advances, we can expect even more innovative uses for manufactured wood, shaping a greener and more diverse future for woodworking enthusiasts and professionals alike.

